Story
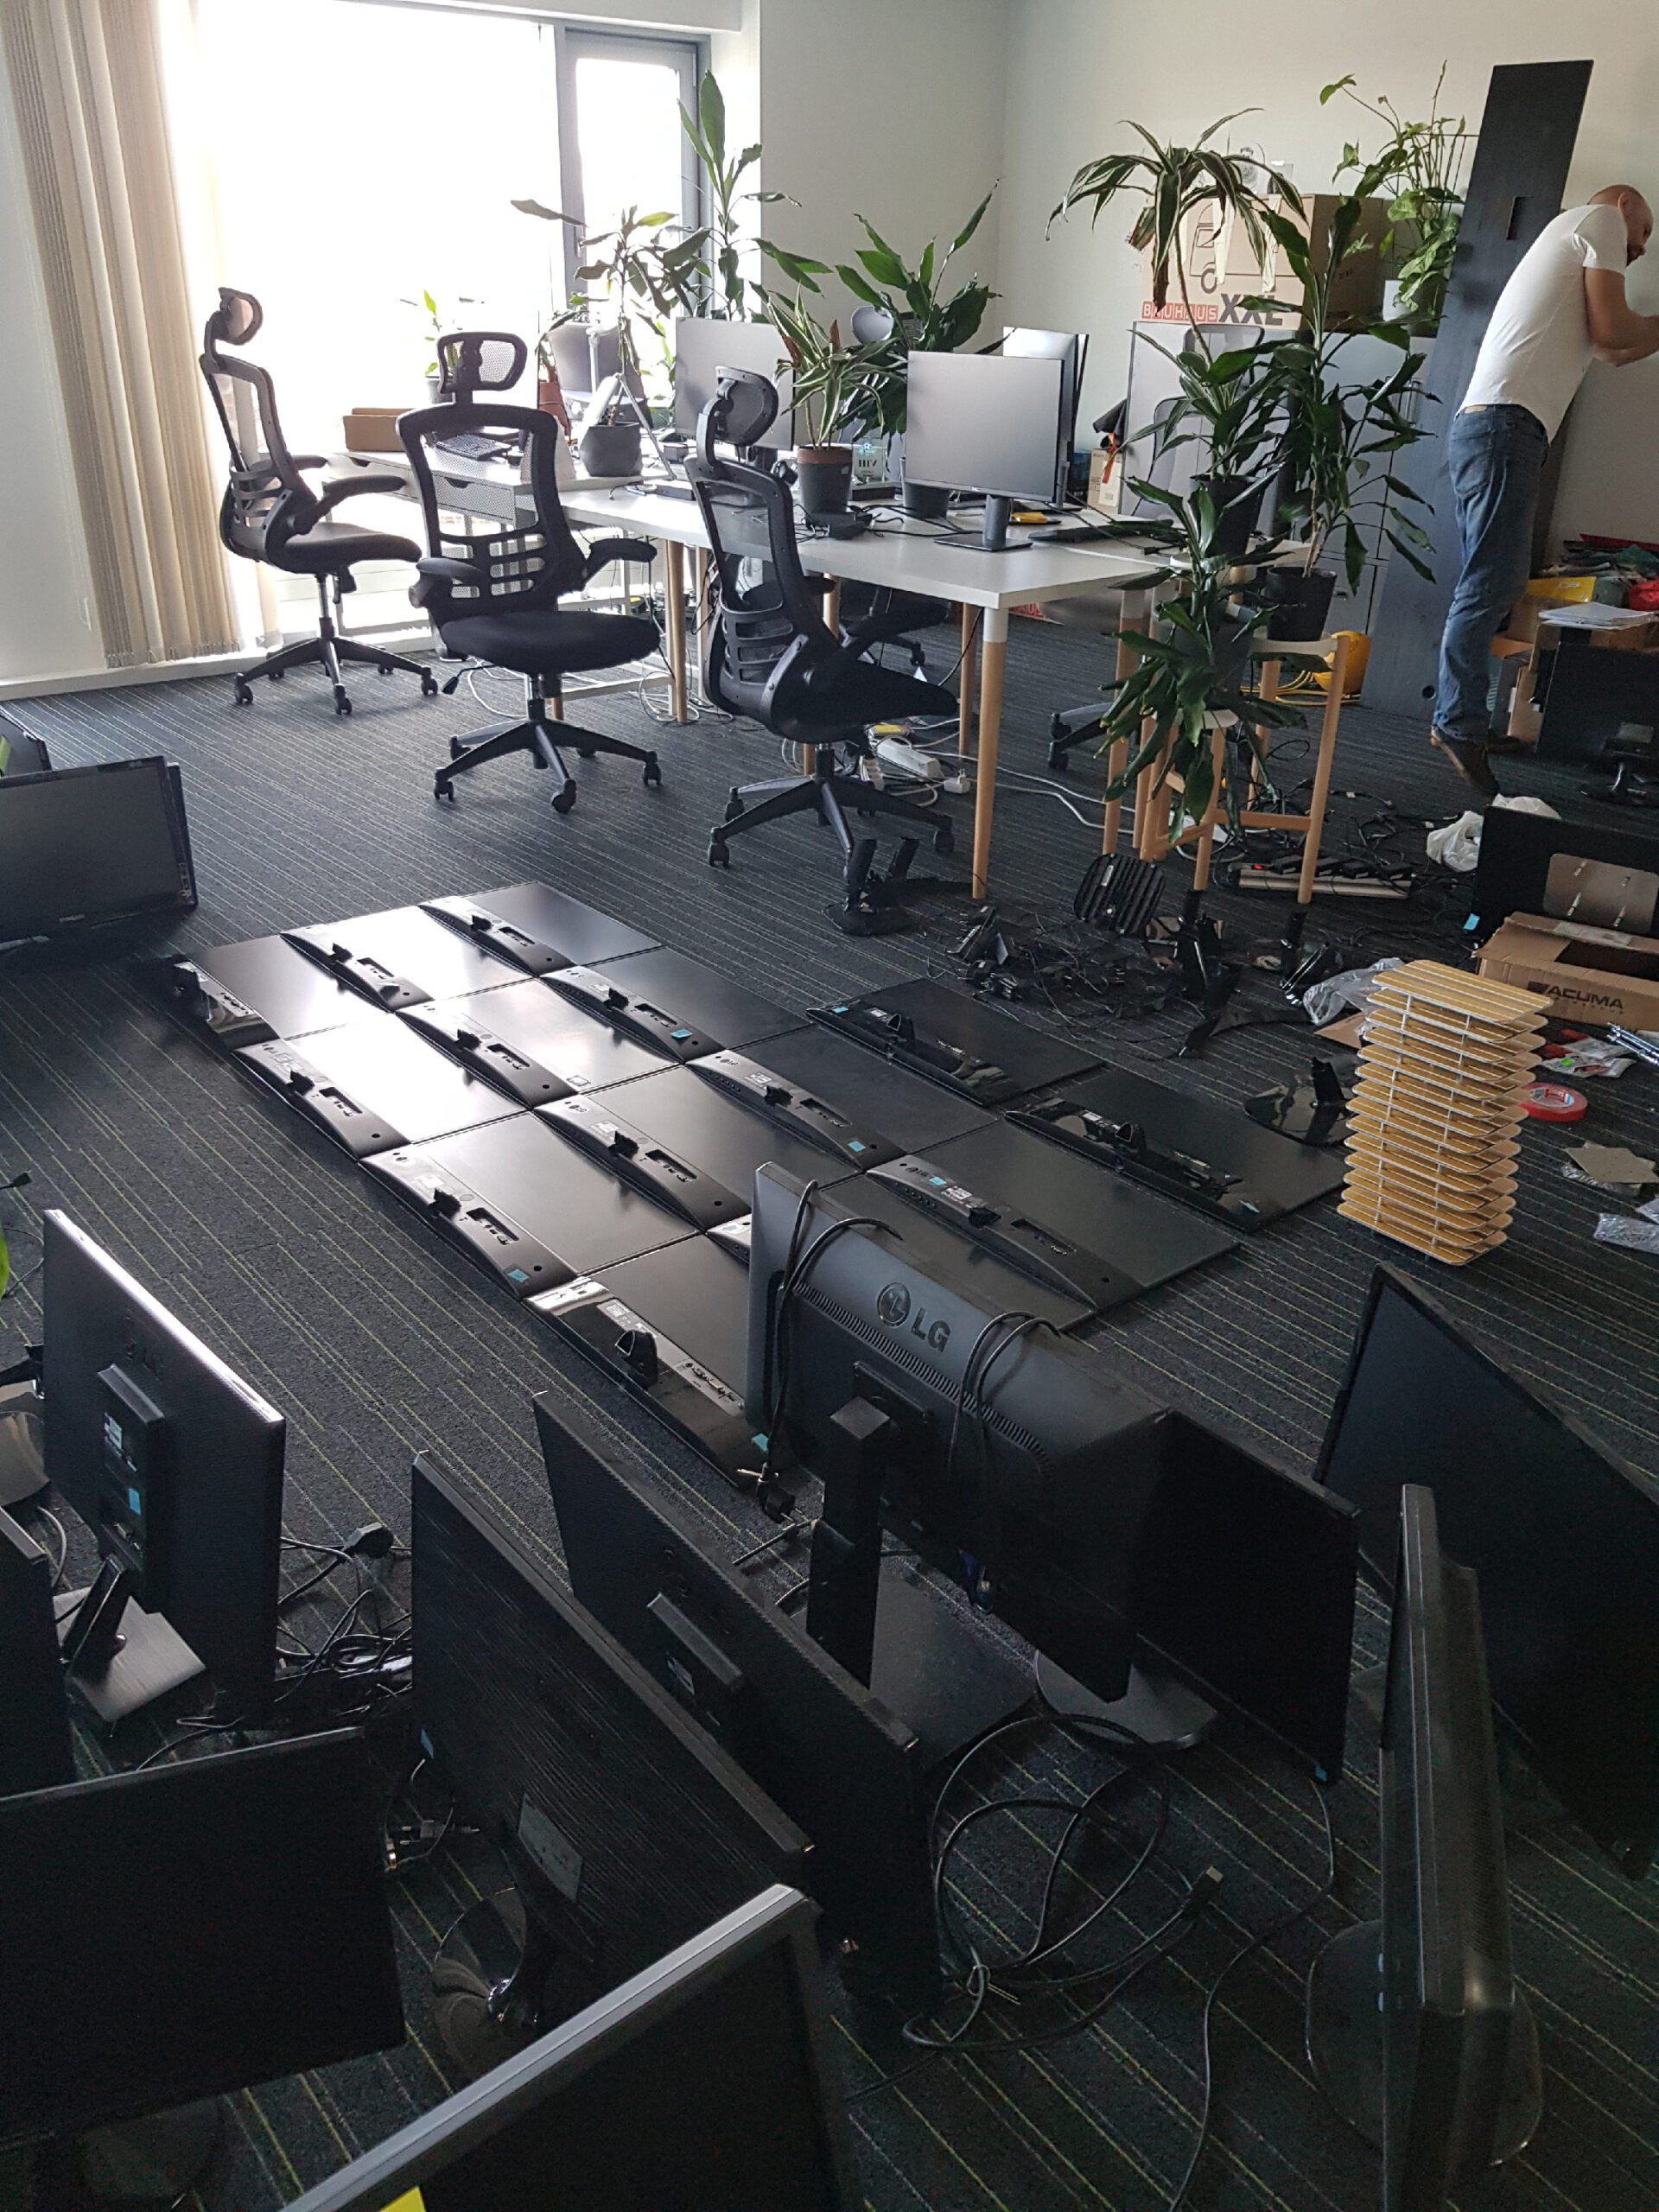
At the meeting, we discussed what to do with a large quantity of old FHD (1920×1080) monitors, which could not be used for anything and could not be thrown away. I proposed the idea of building a monitor wall and the idea was explored.
Research
First of all, it was necessary to figure out which device will play all the monitors. The video should be in sync and if possible run in FHD and 60Hz, i.e. the maximum that the monitor allows. We considered adding a Raspberry Pi computer to each monitor or two, or using four computers, each of which would run one.
When all options were examined, I found that with a budget of €1,000 you can purchase the necessary hardware (excluding existing monitors) and material to build the monitor wall. The HP Z820 workstation was chosen, in which four Nvidia NVS 510 cards, each with four DisplayPort slots, were installed. All the hardware was second hand, which was cheaper and gave the old hardware a second life. Also in terms of software simplicity, it was decided in favor of Nvidia cards, which would run in one platform so that Nvidia Mosaic technology could be used.
Design
VESA
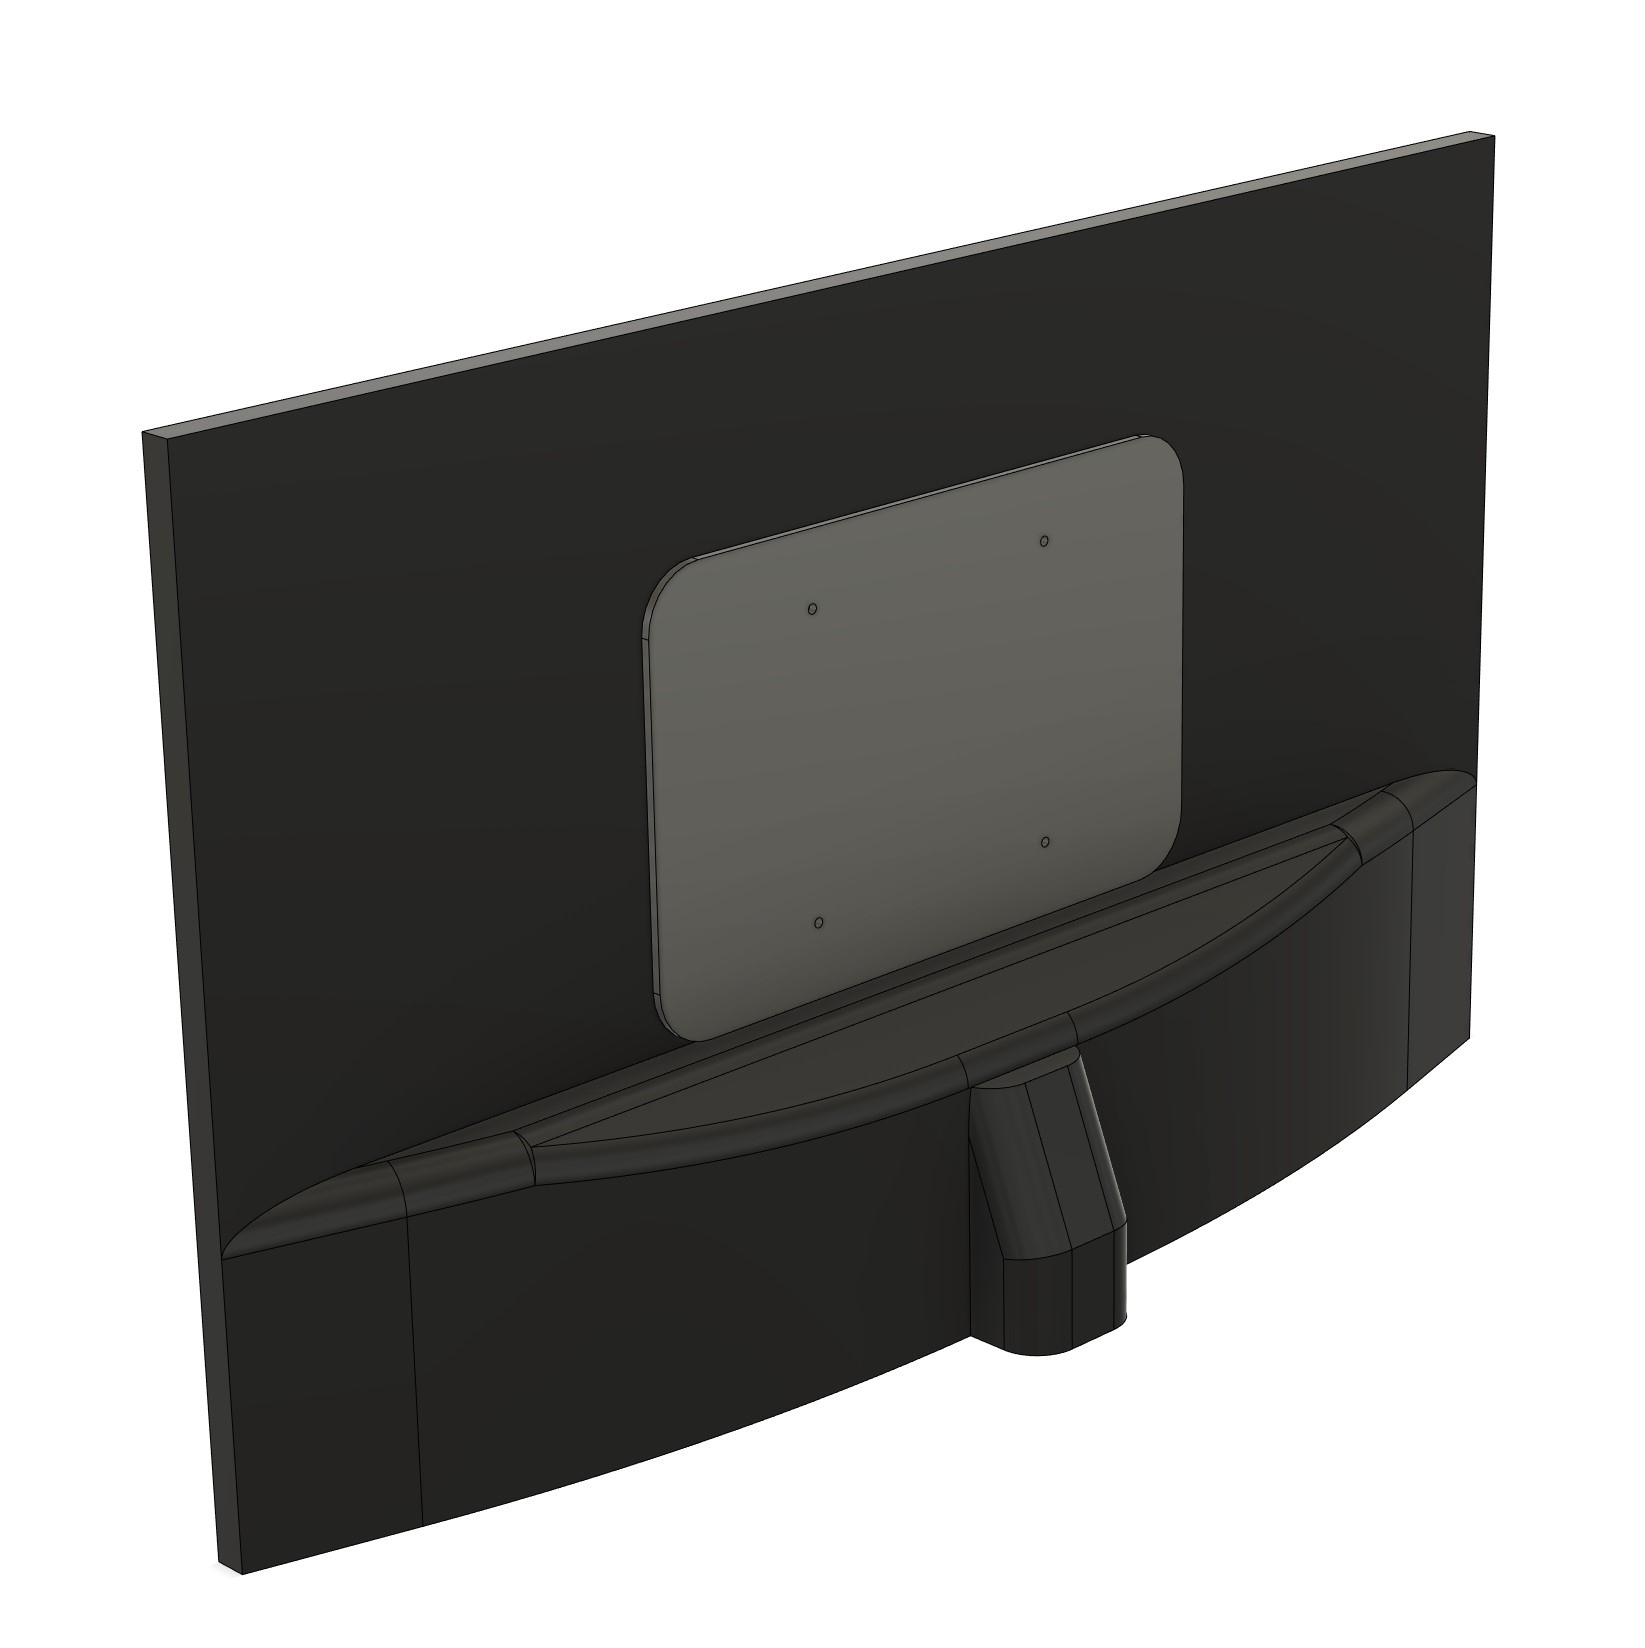
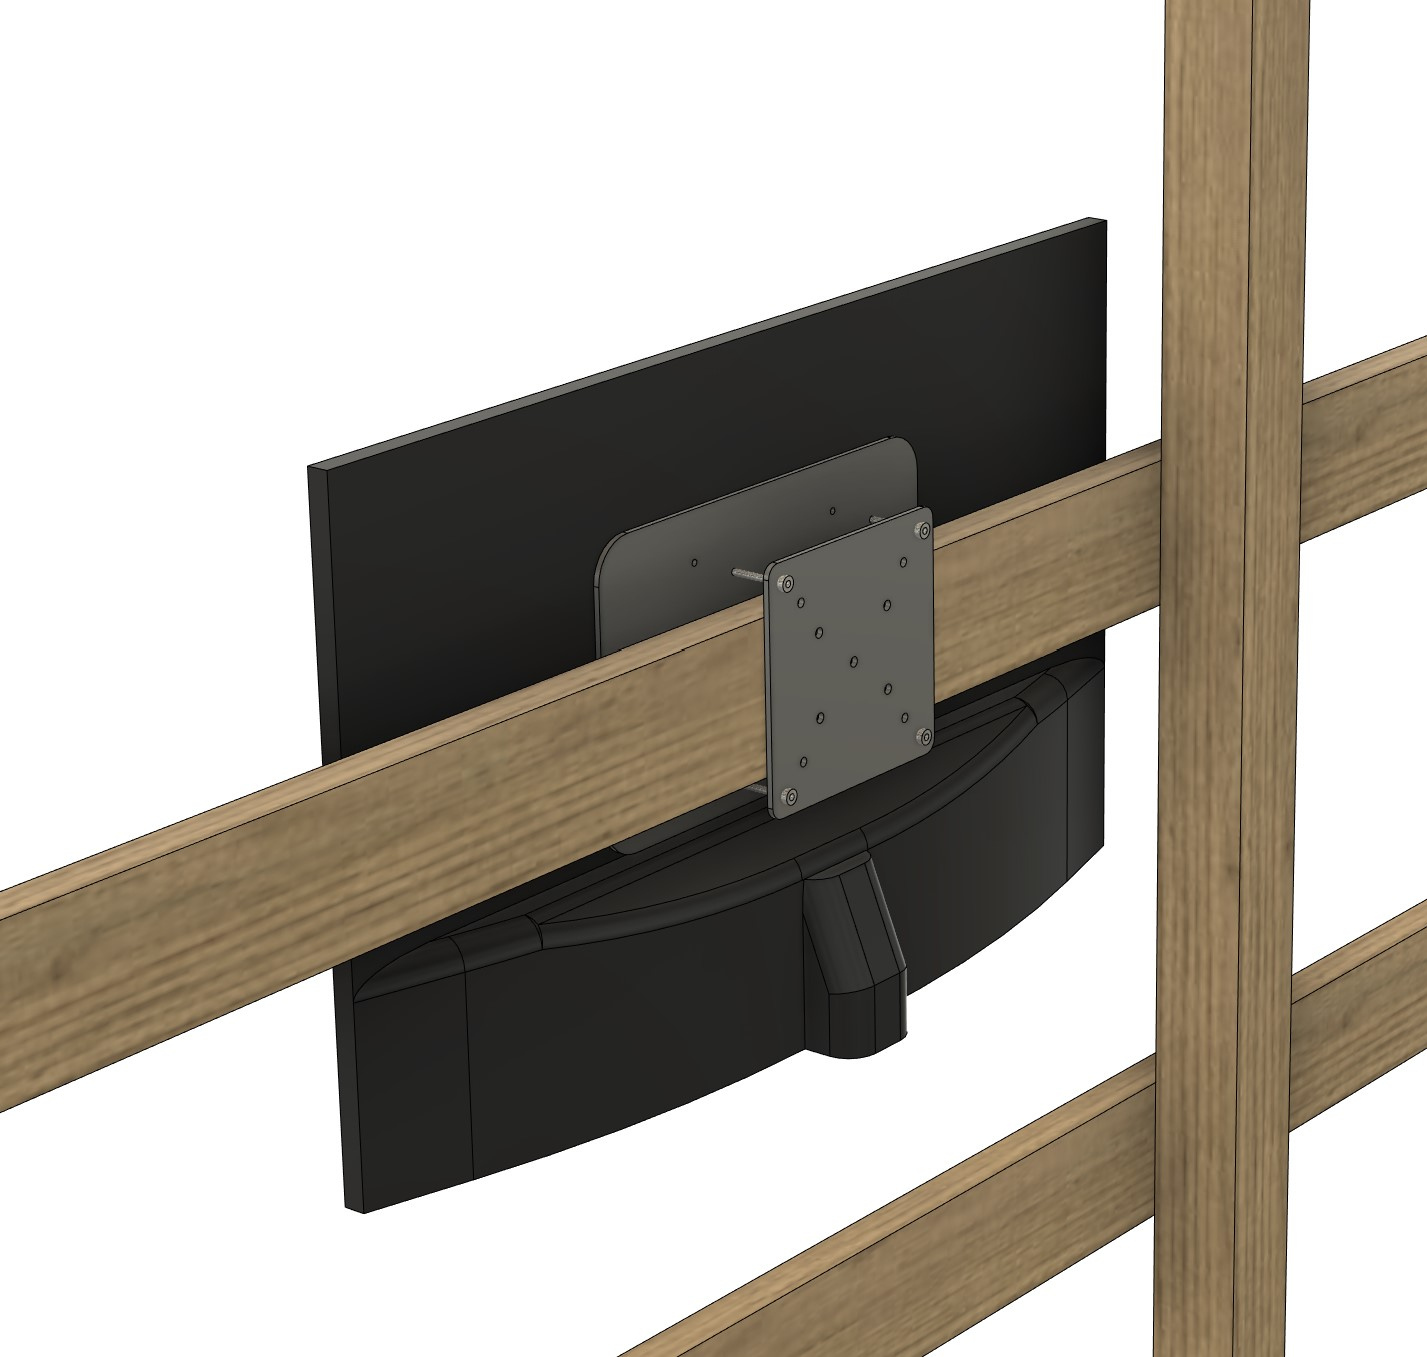
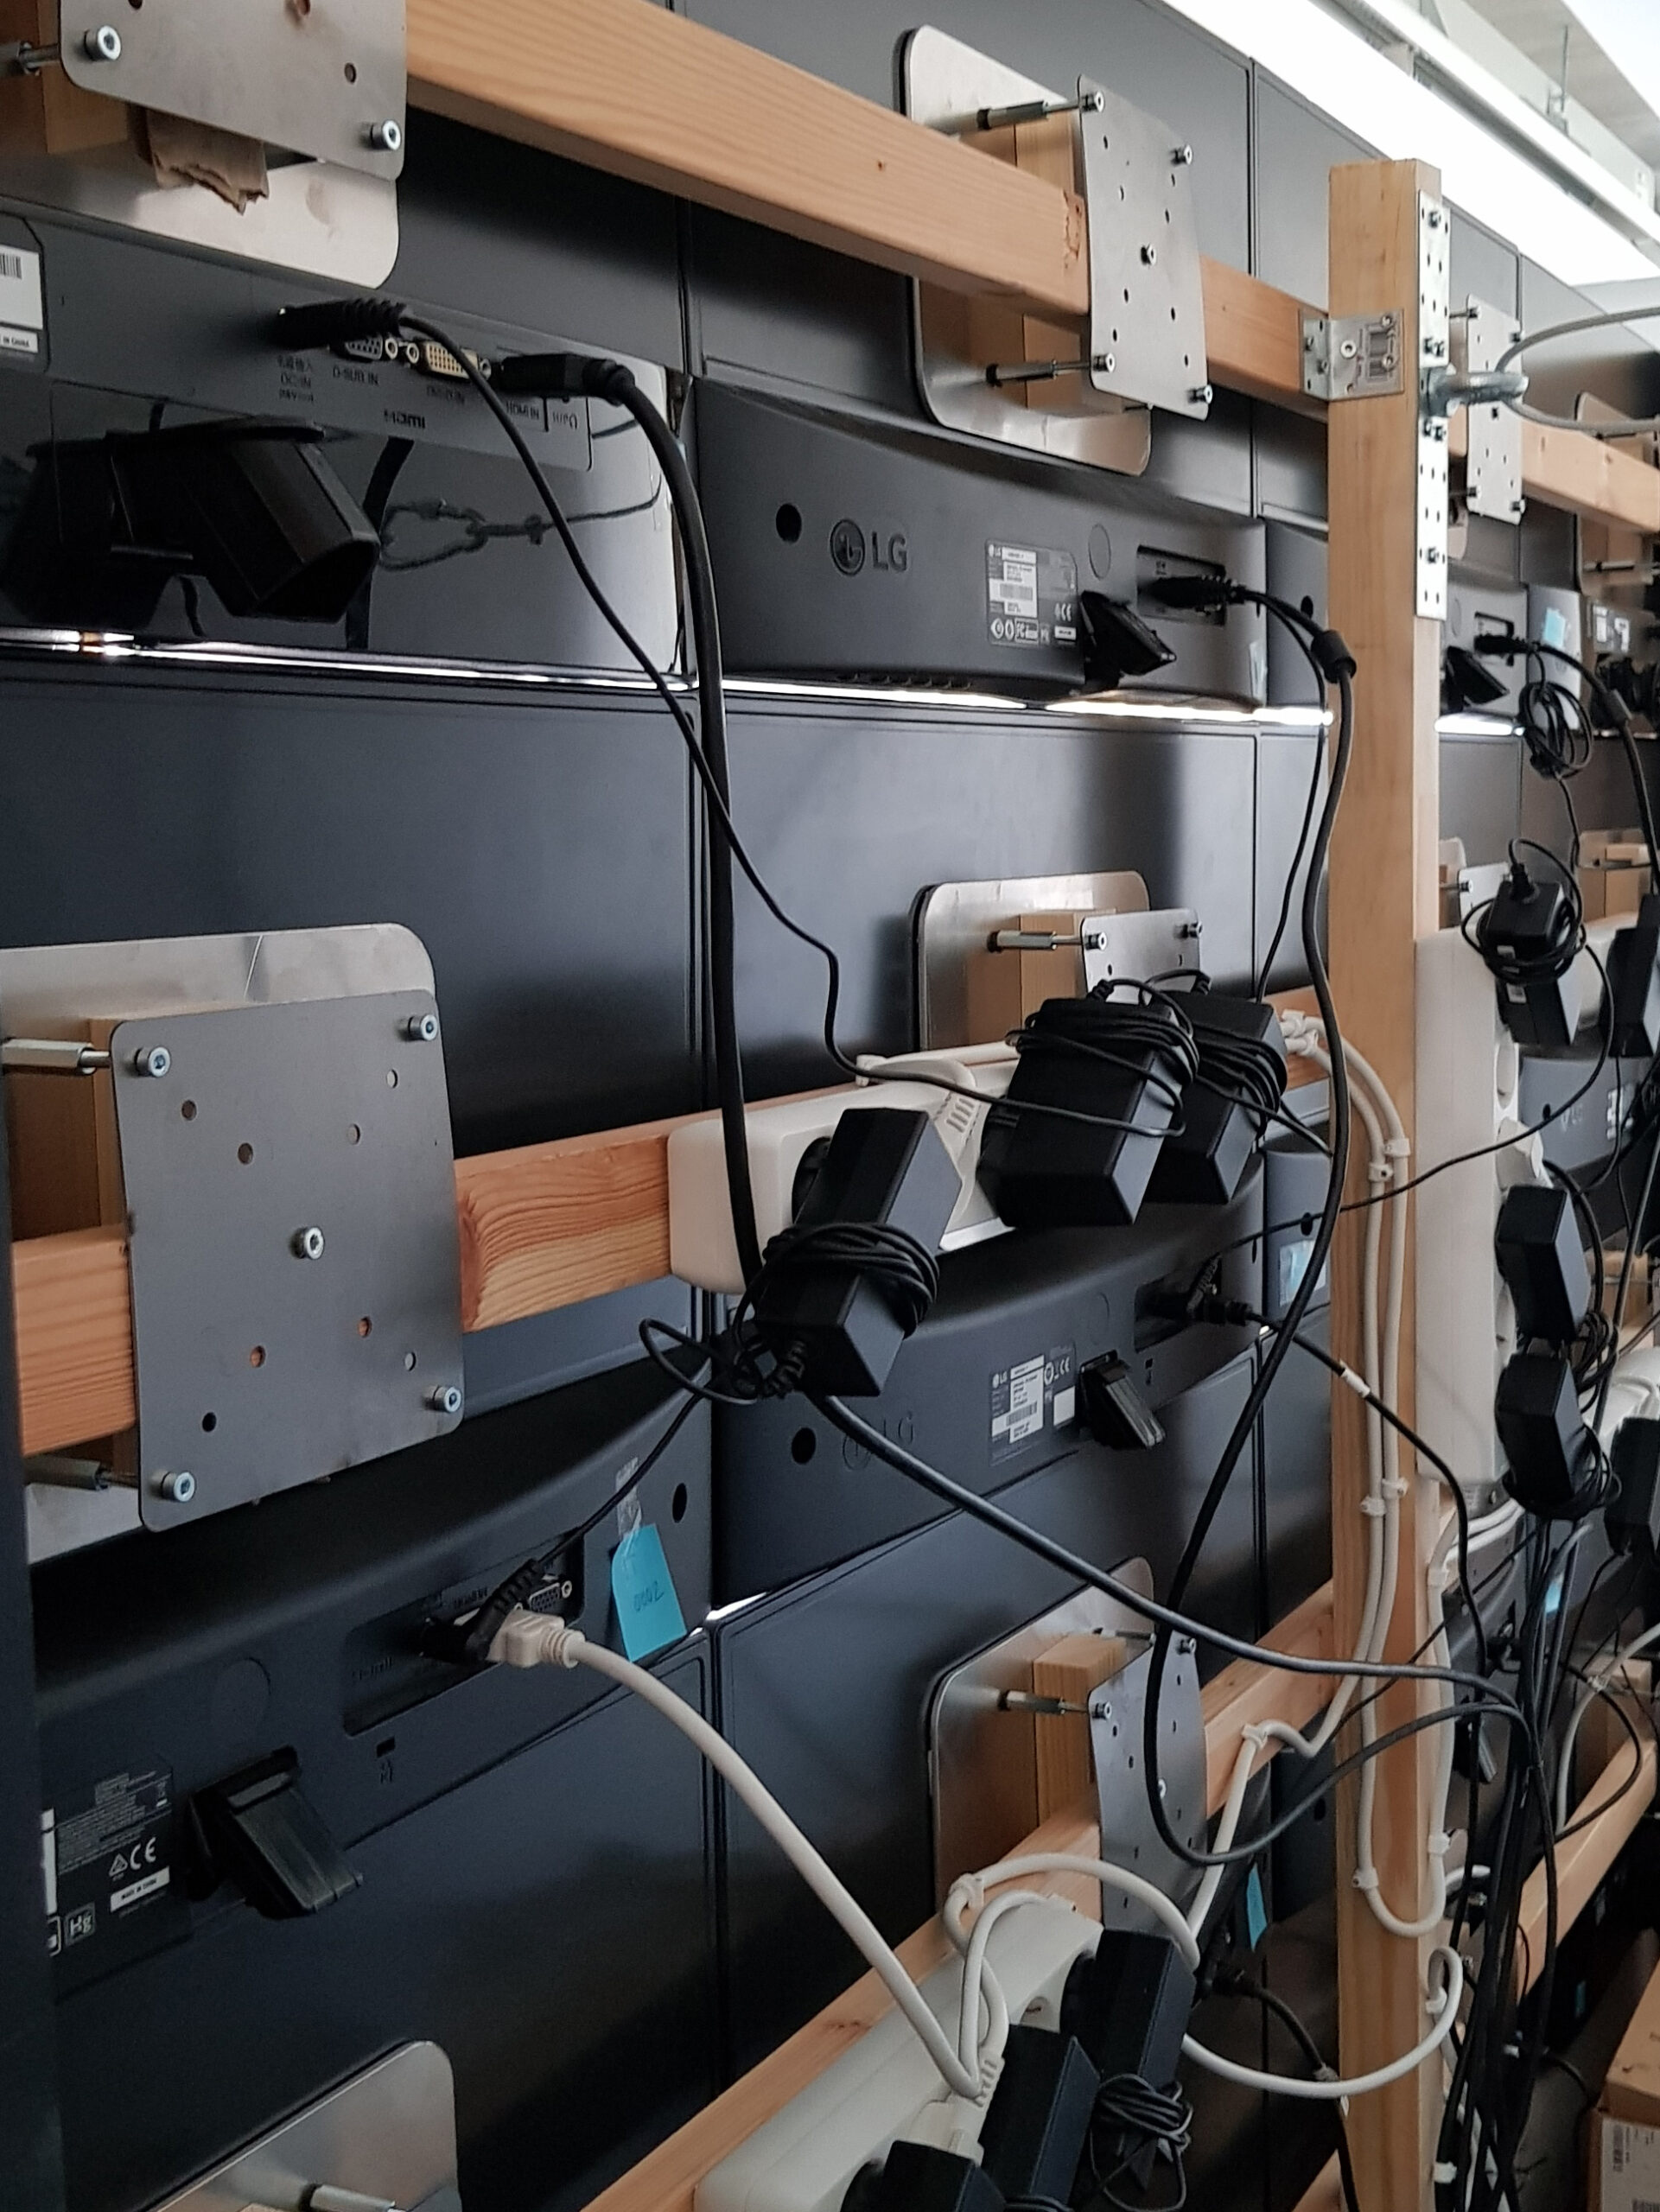
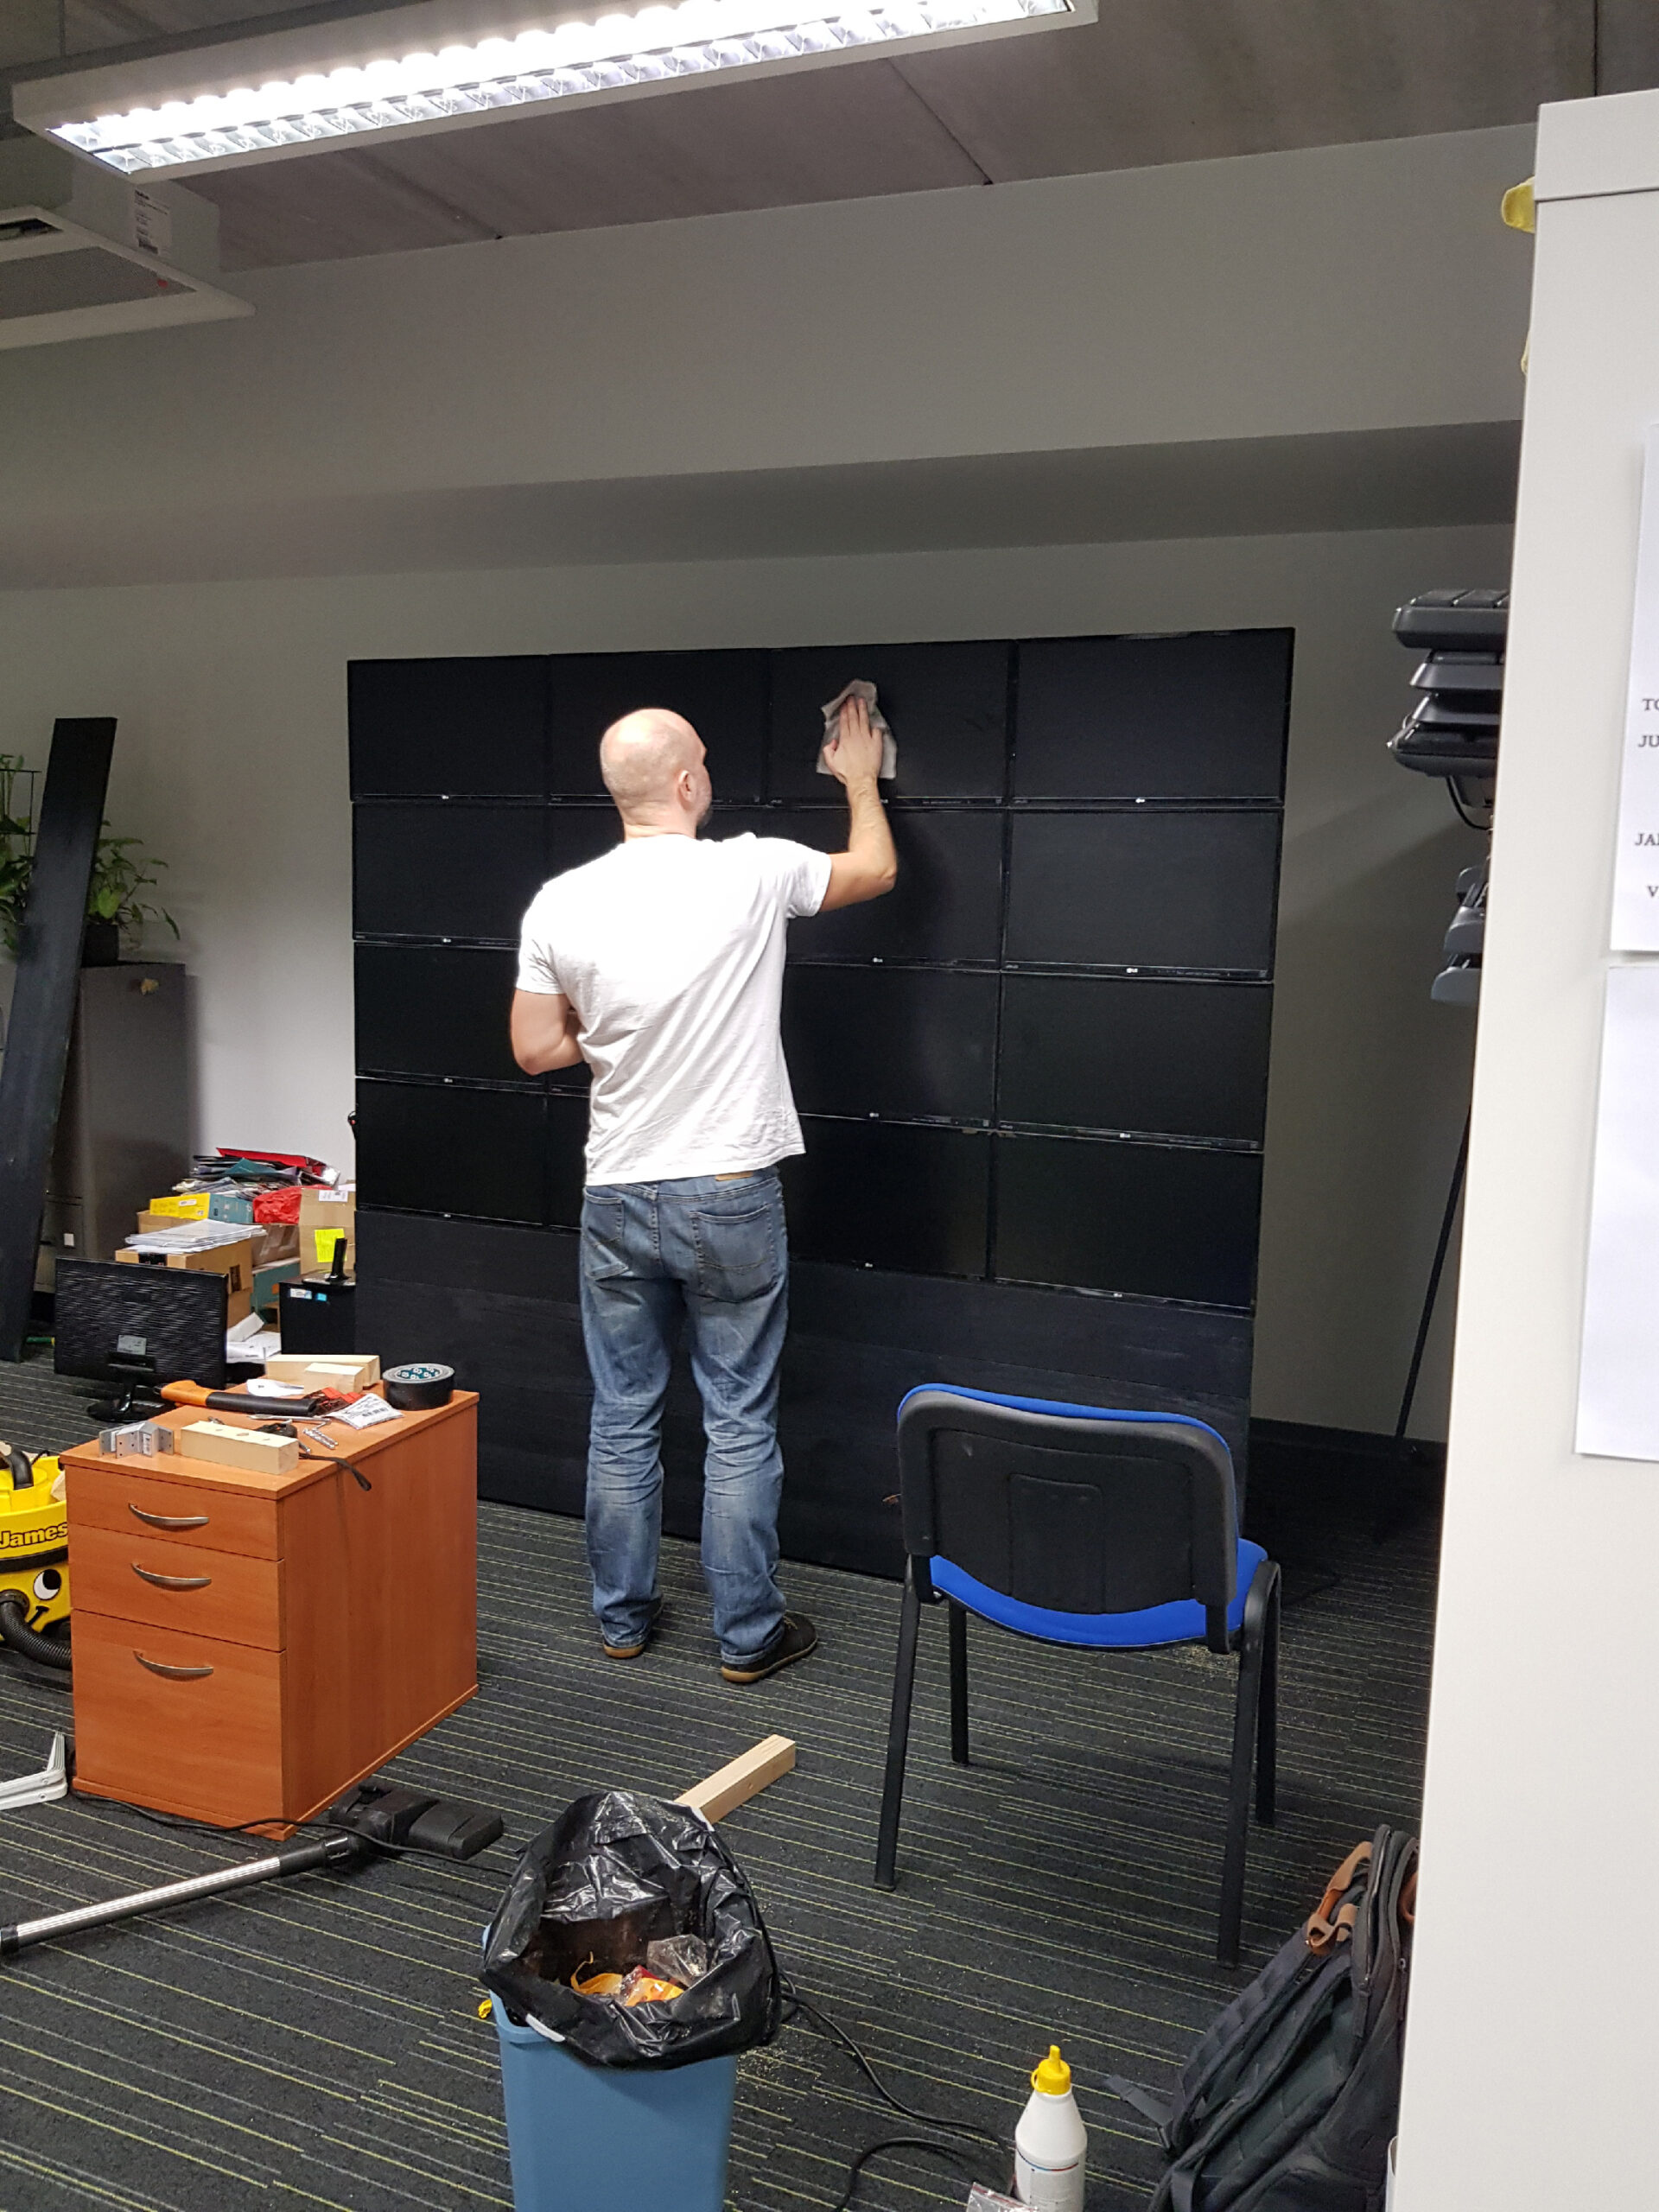
Since the monitors lacked VESA holes and no possibility of wall mounting at all, one solution was to permanently attach a metal plate compatible with the VESA100 standard to the back of the monitor with double-sided tape, with which it would be possible to mount the monitor to the monitor wall.
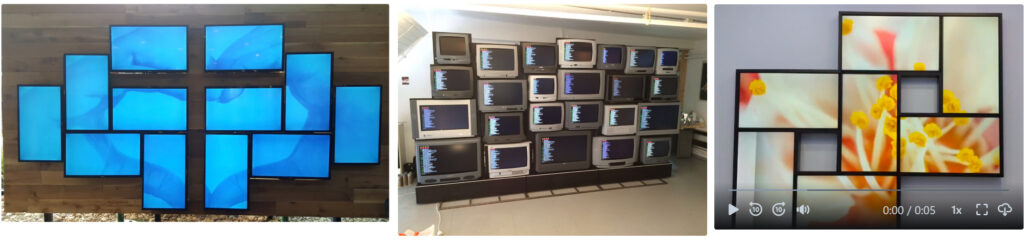
Since the monitors were also of different sizes, which would have made the screen wall very uneven, the final solution saw a wooden beam to which the monitor is attached thanks to another metal plate with four screws. This made it possible to position the monitors in two directions, left-right and up-down by 3~4cm. To move the monitor in and out, a block of different thickness was placed between the metal plate, which fixed the distance. The jaw and pitch of the monitor itself could be slightly changed by tightening screws in different corners.
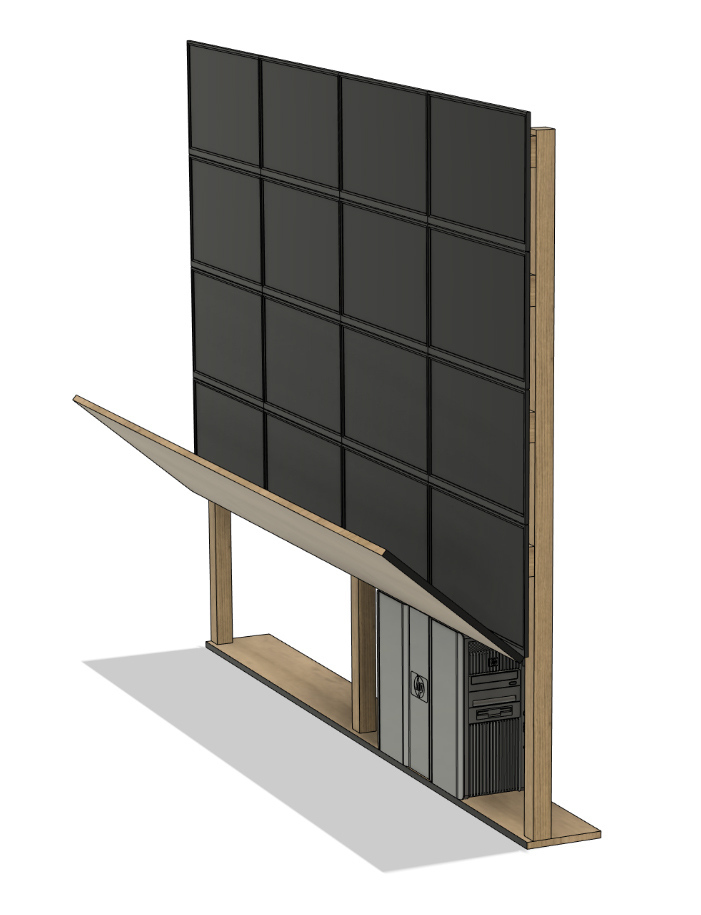
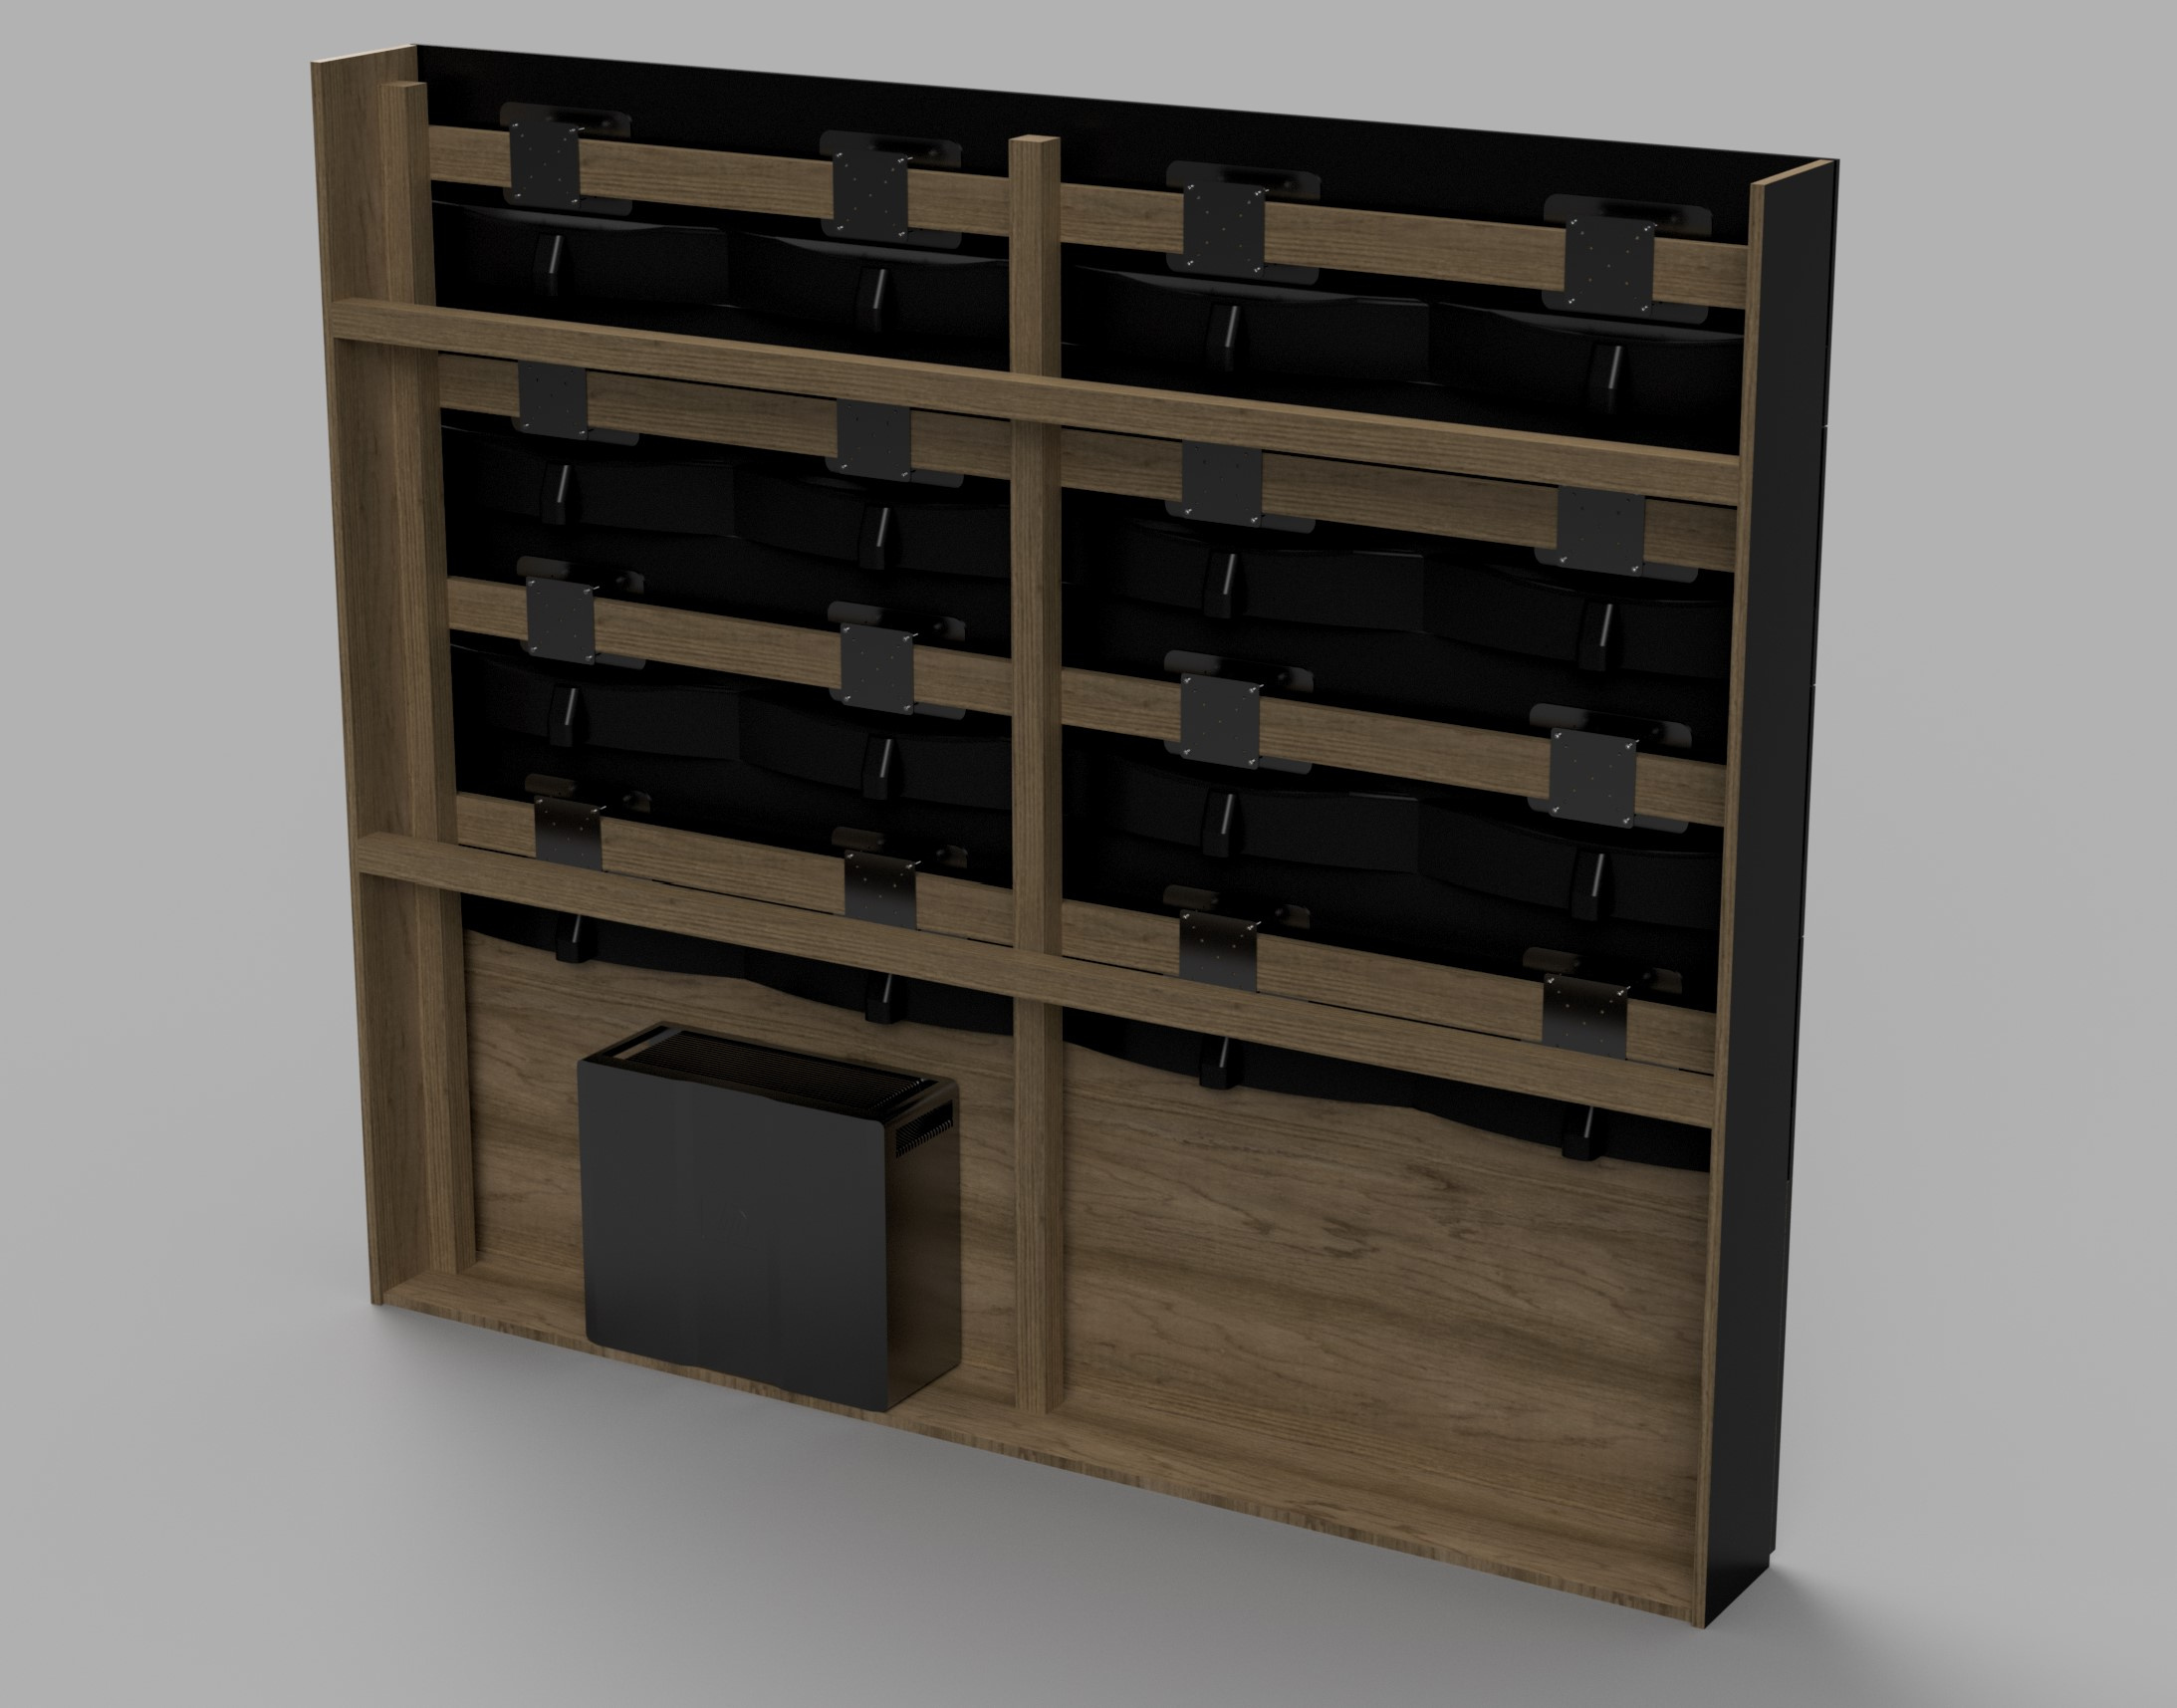
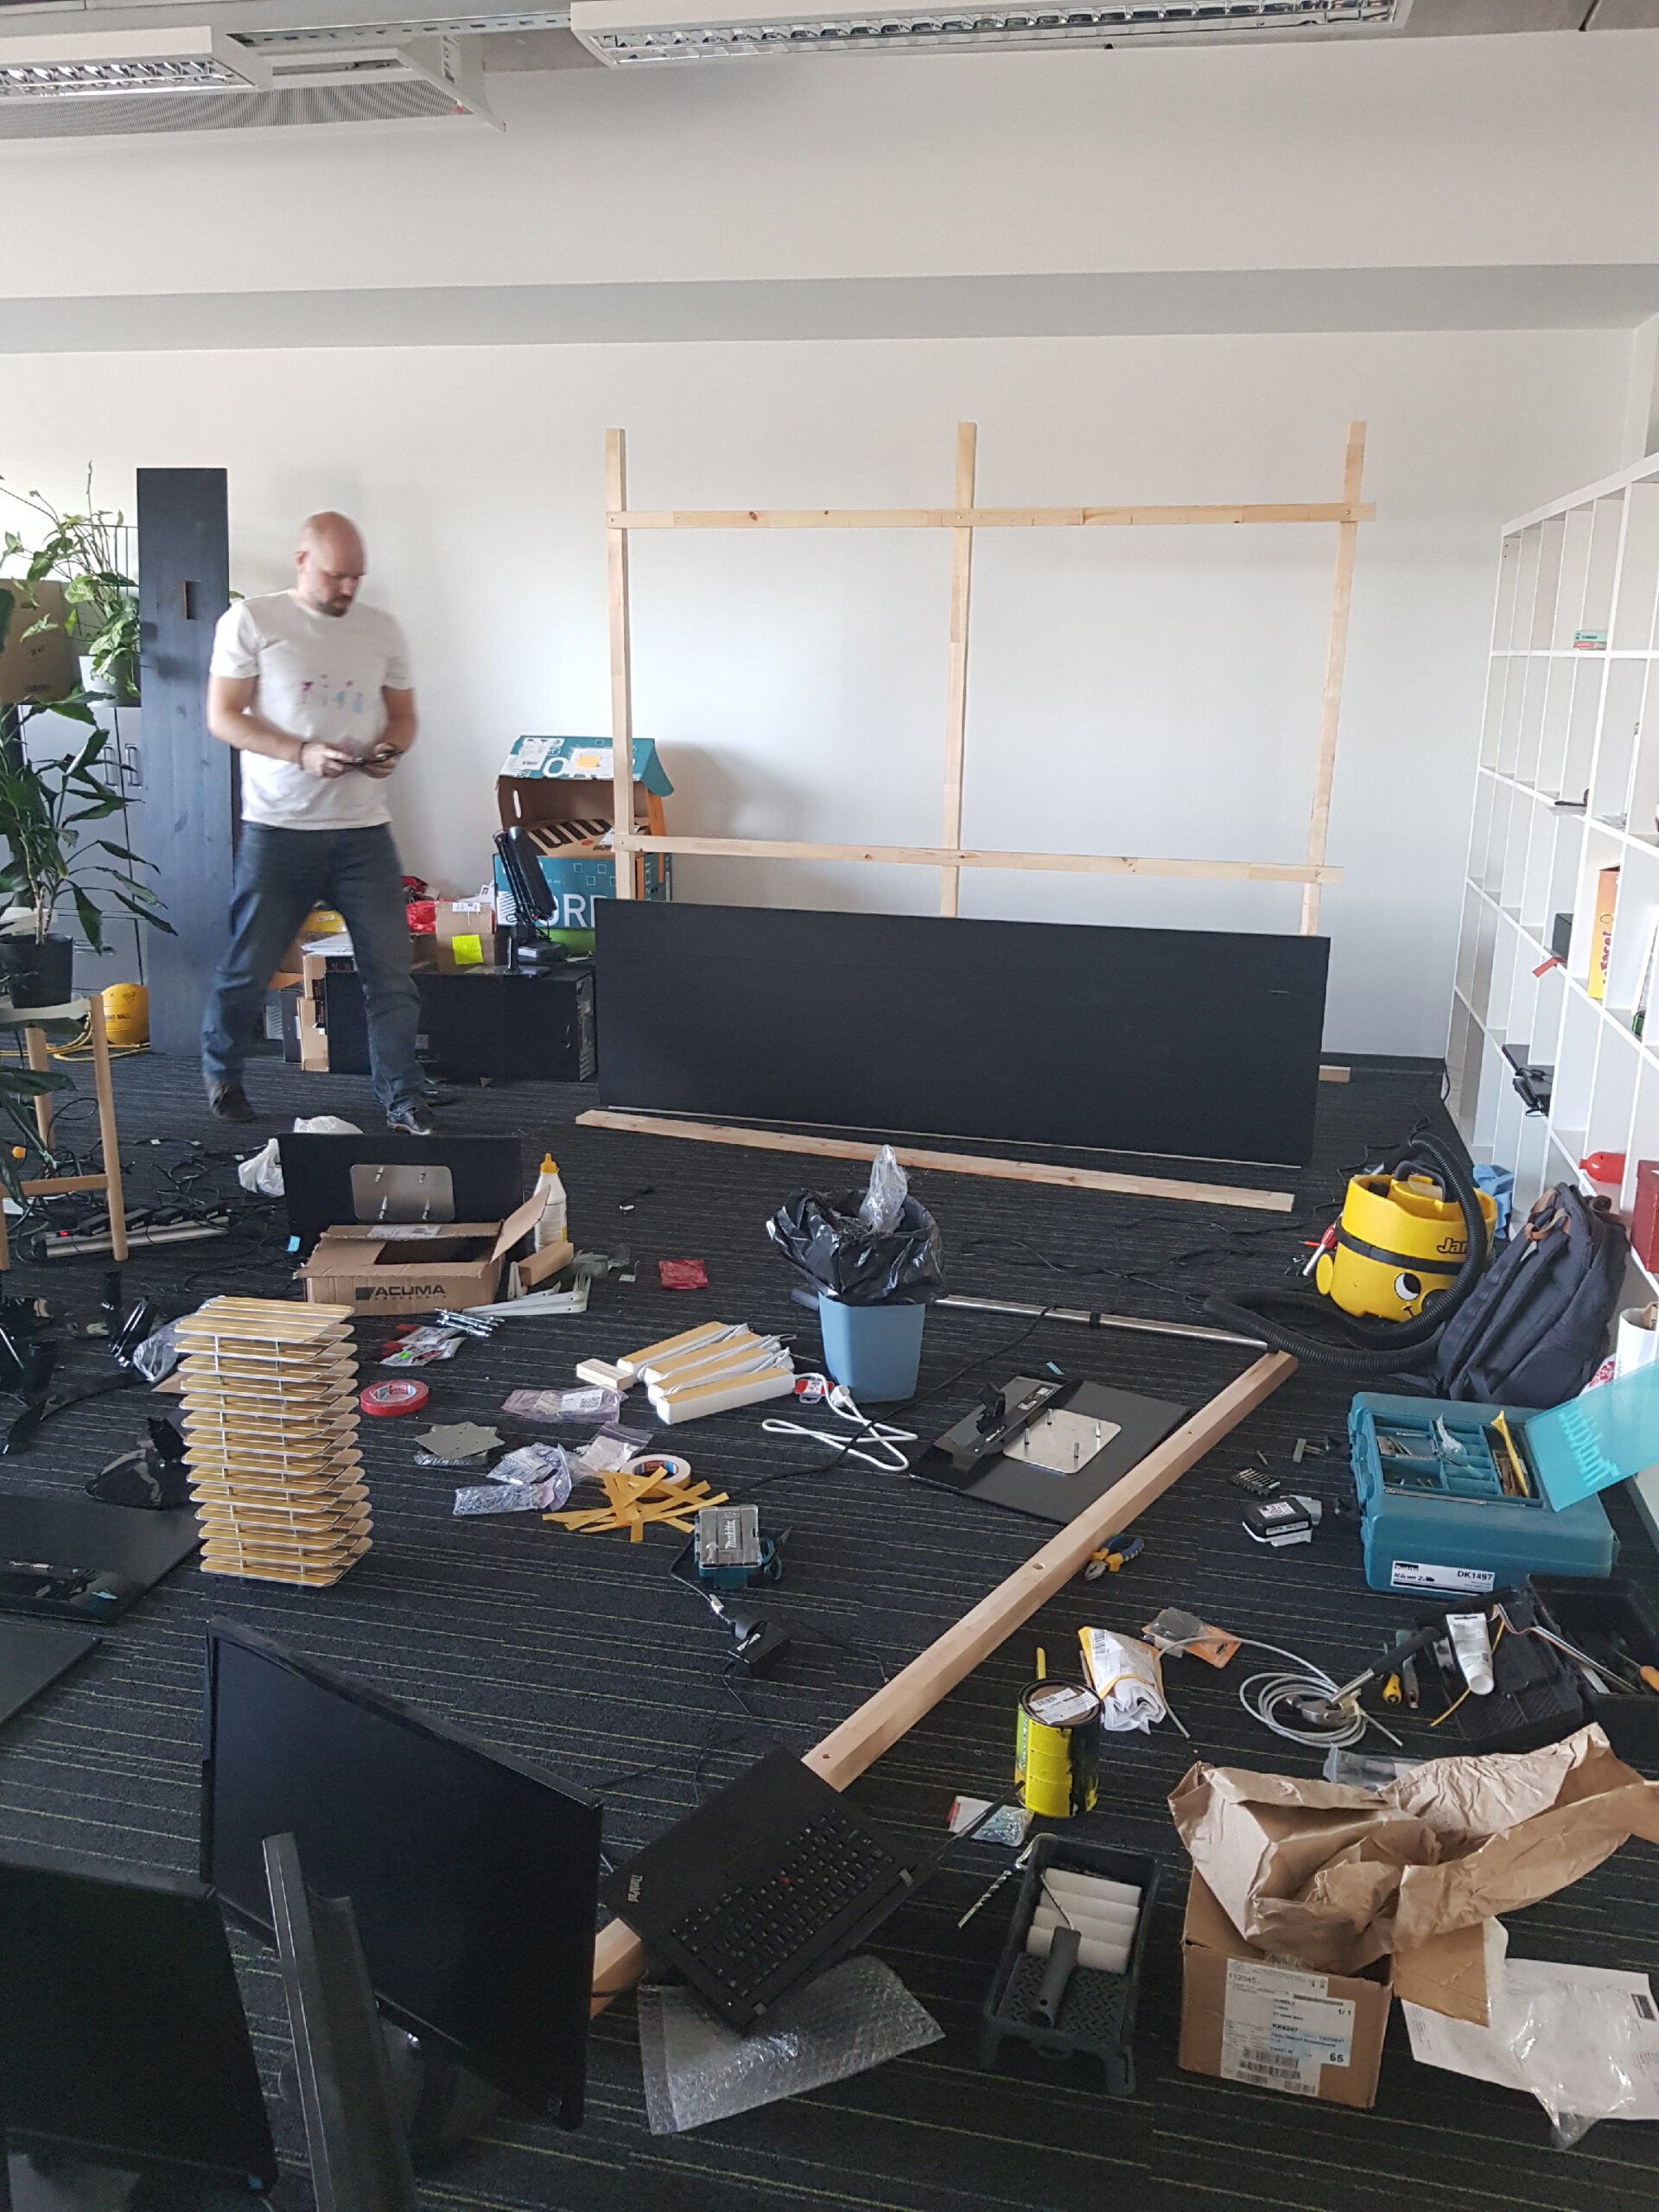
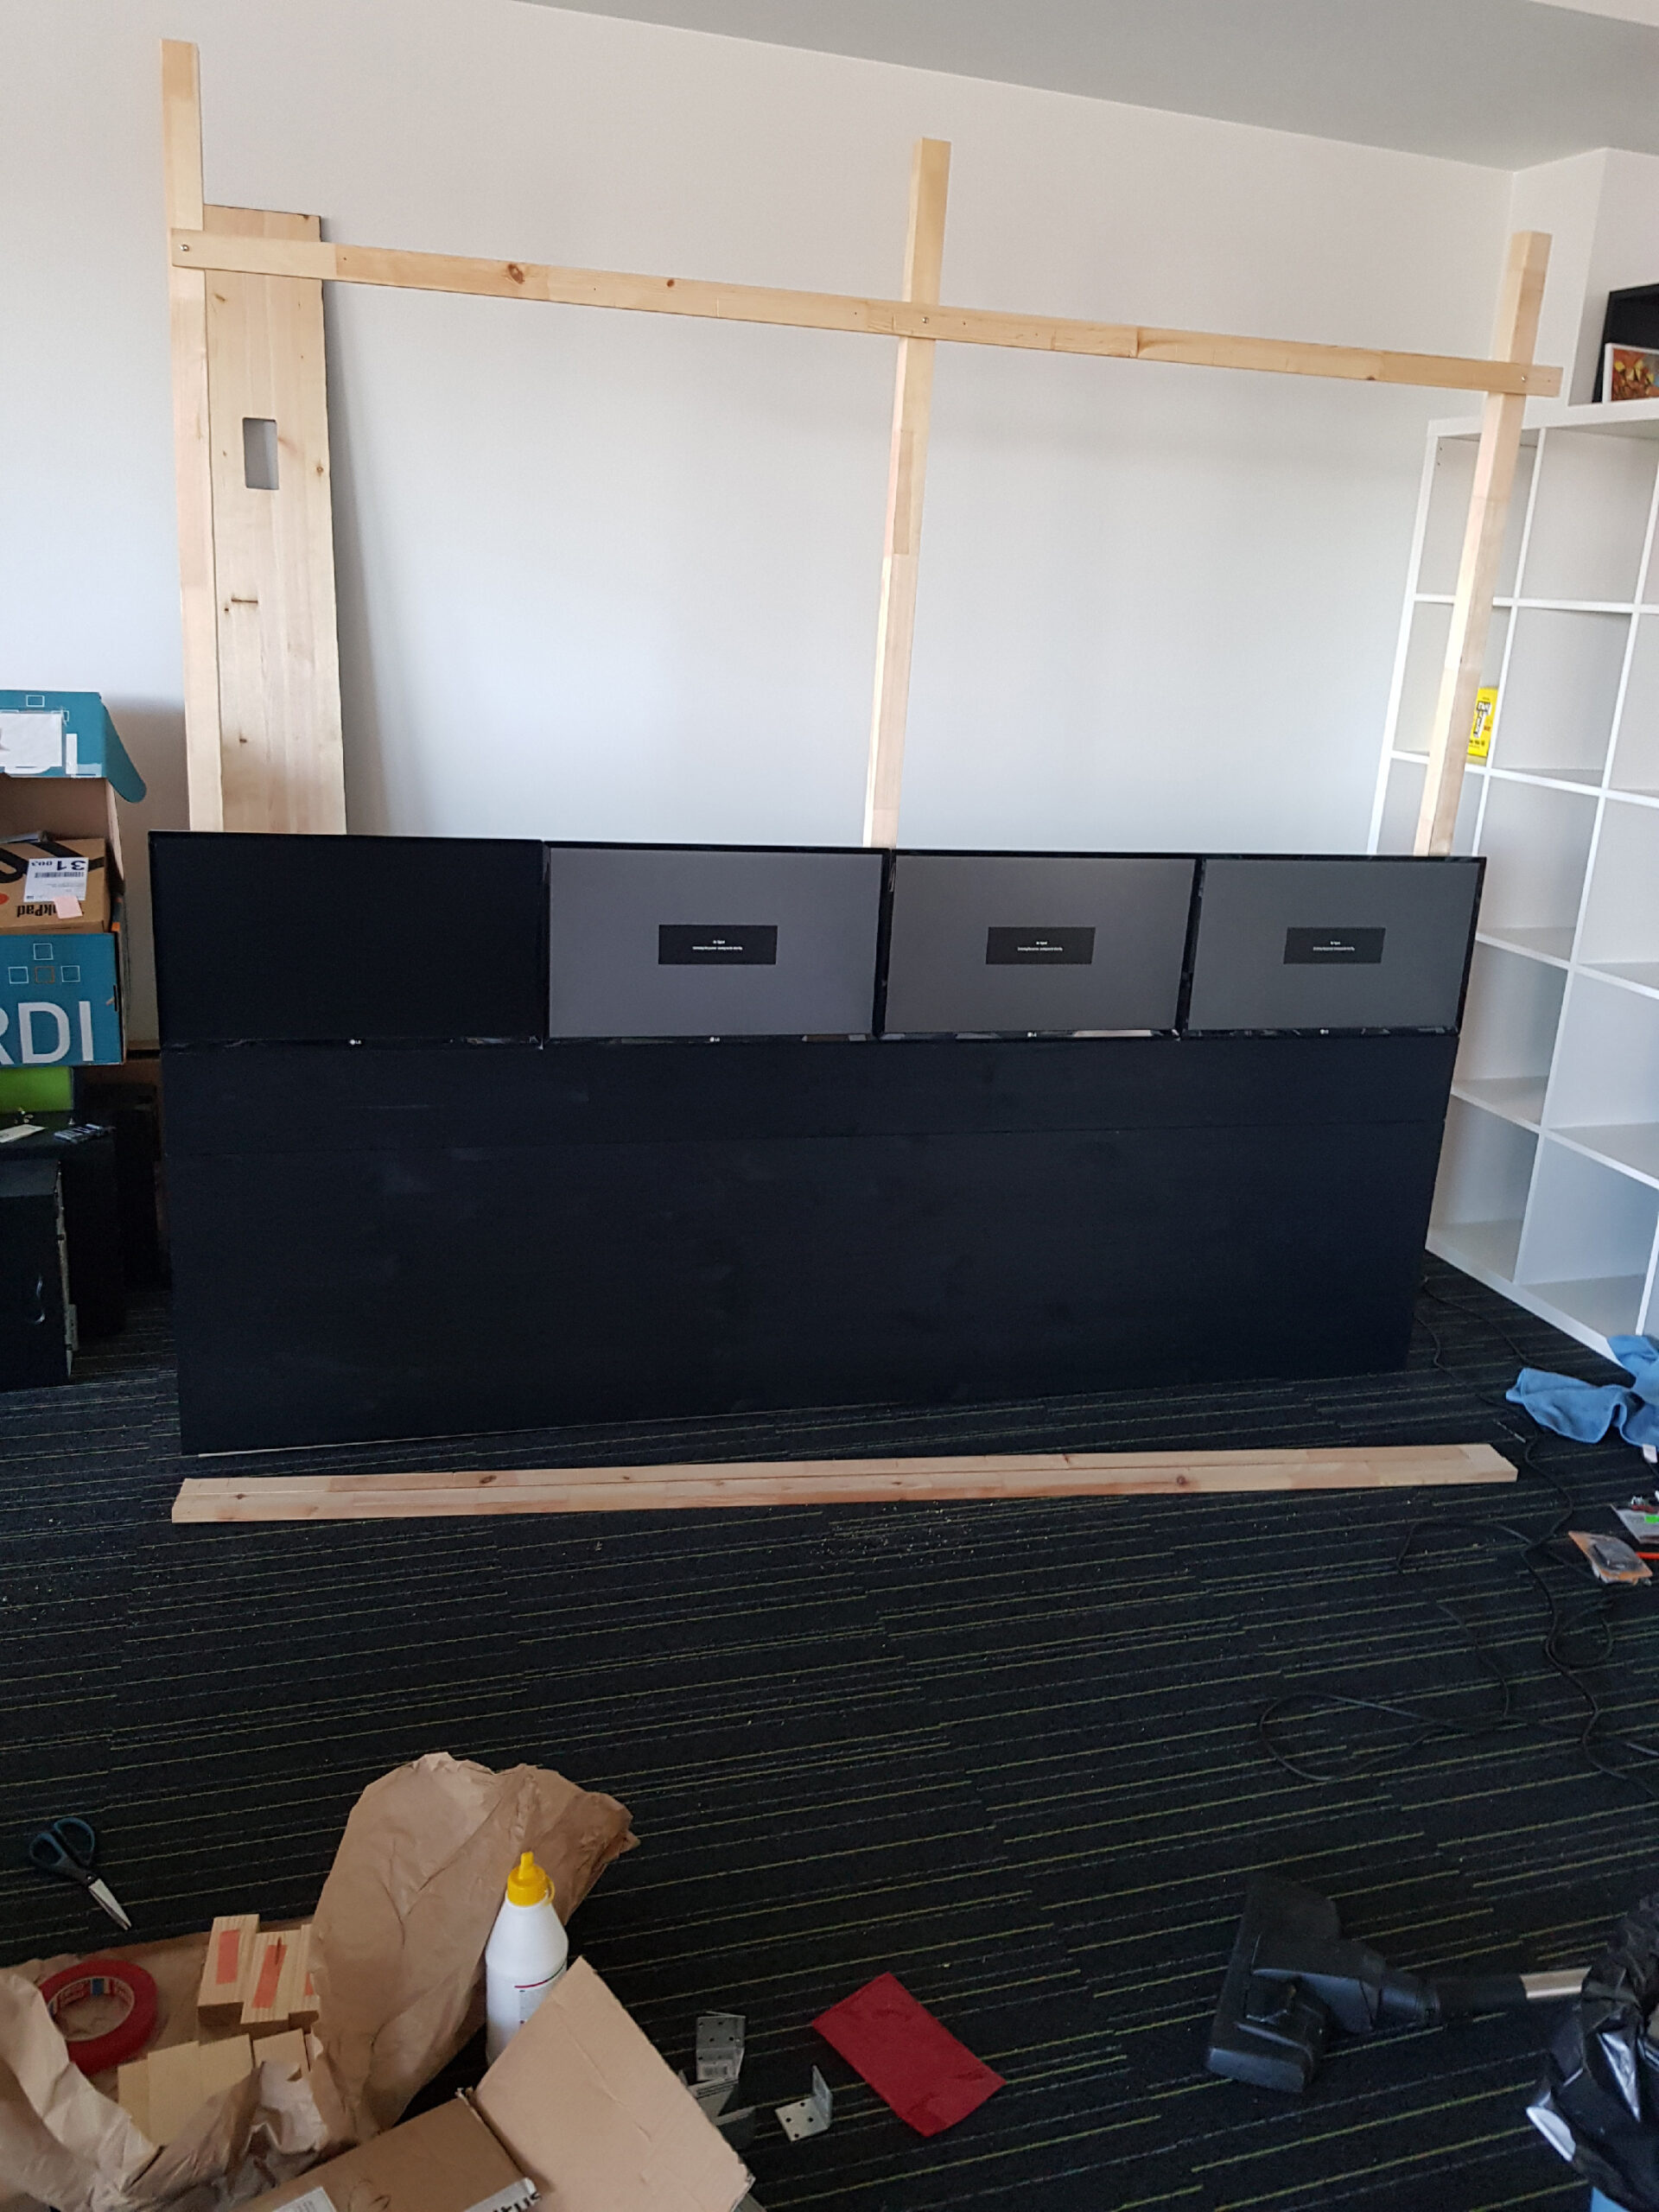
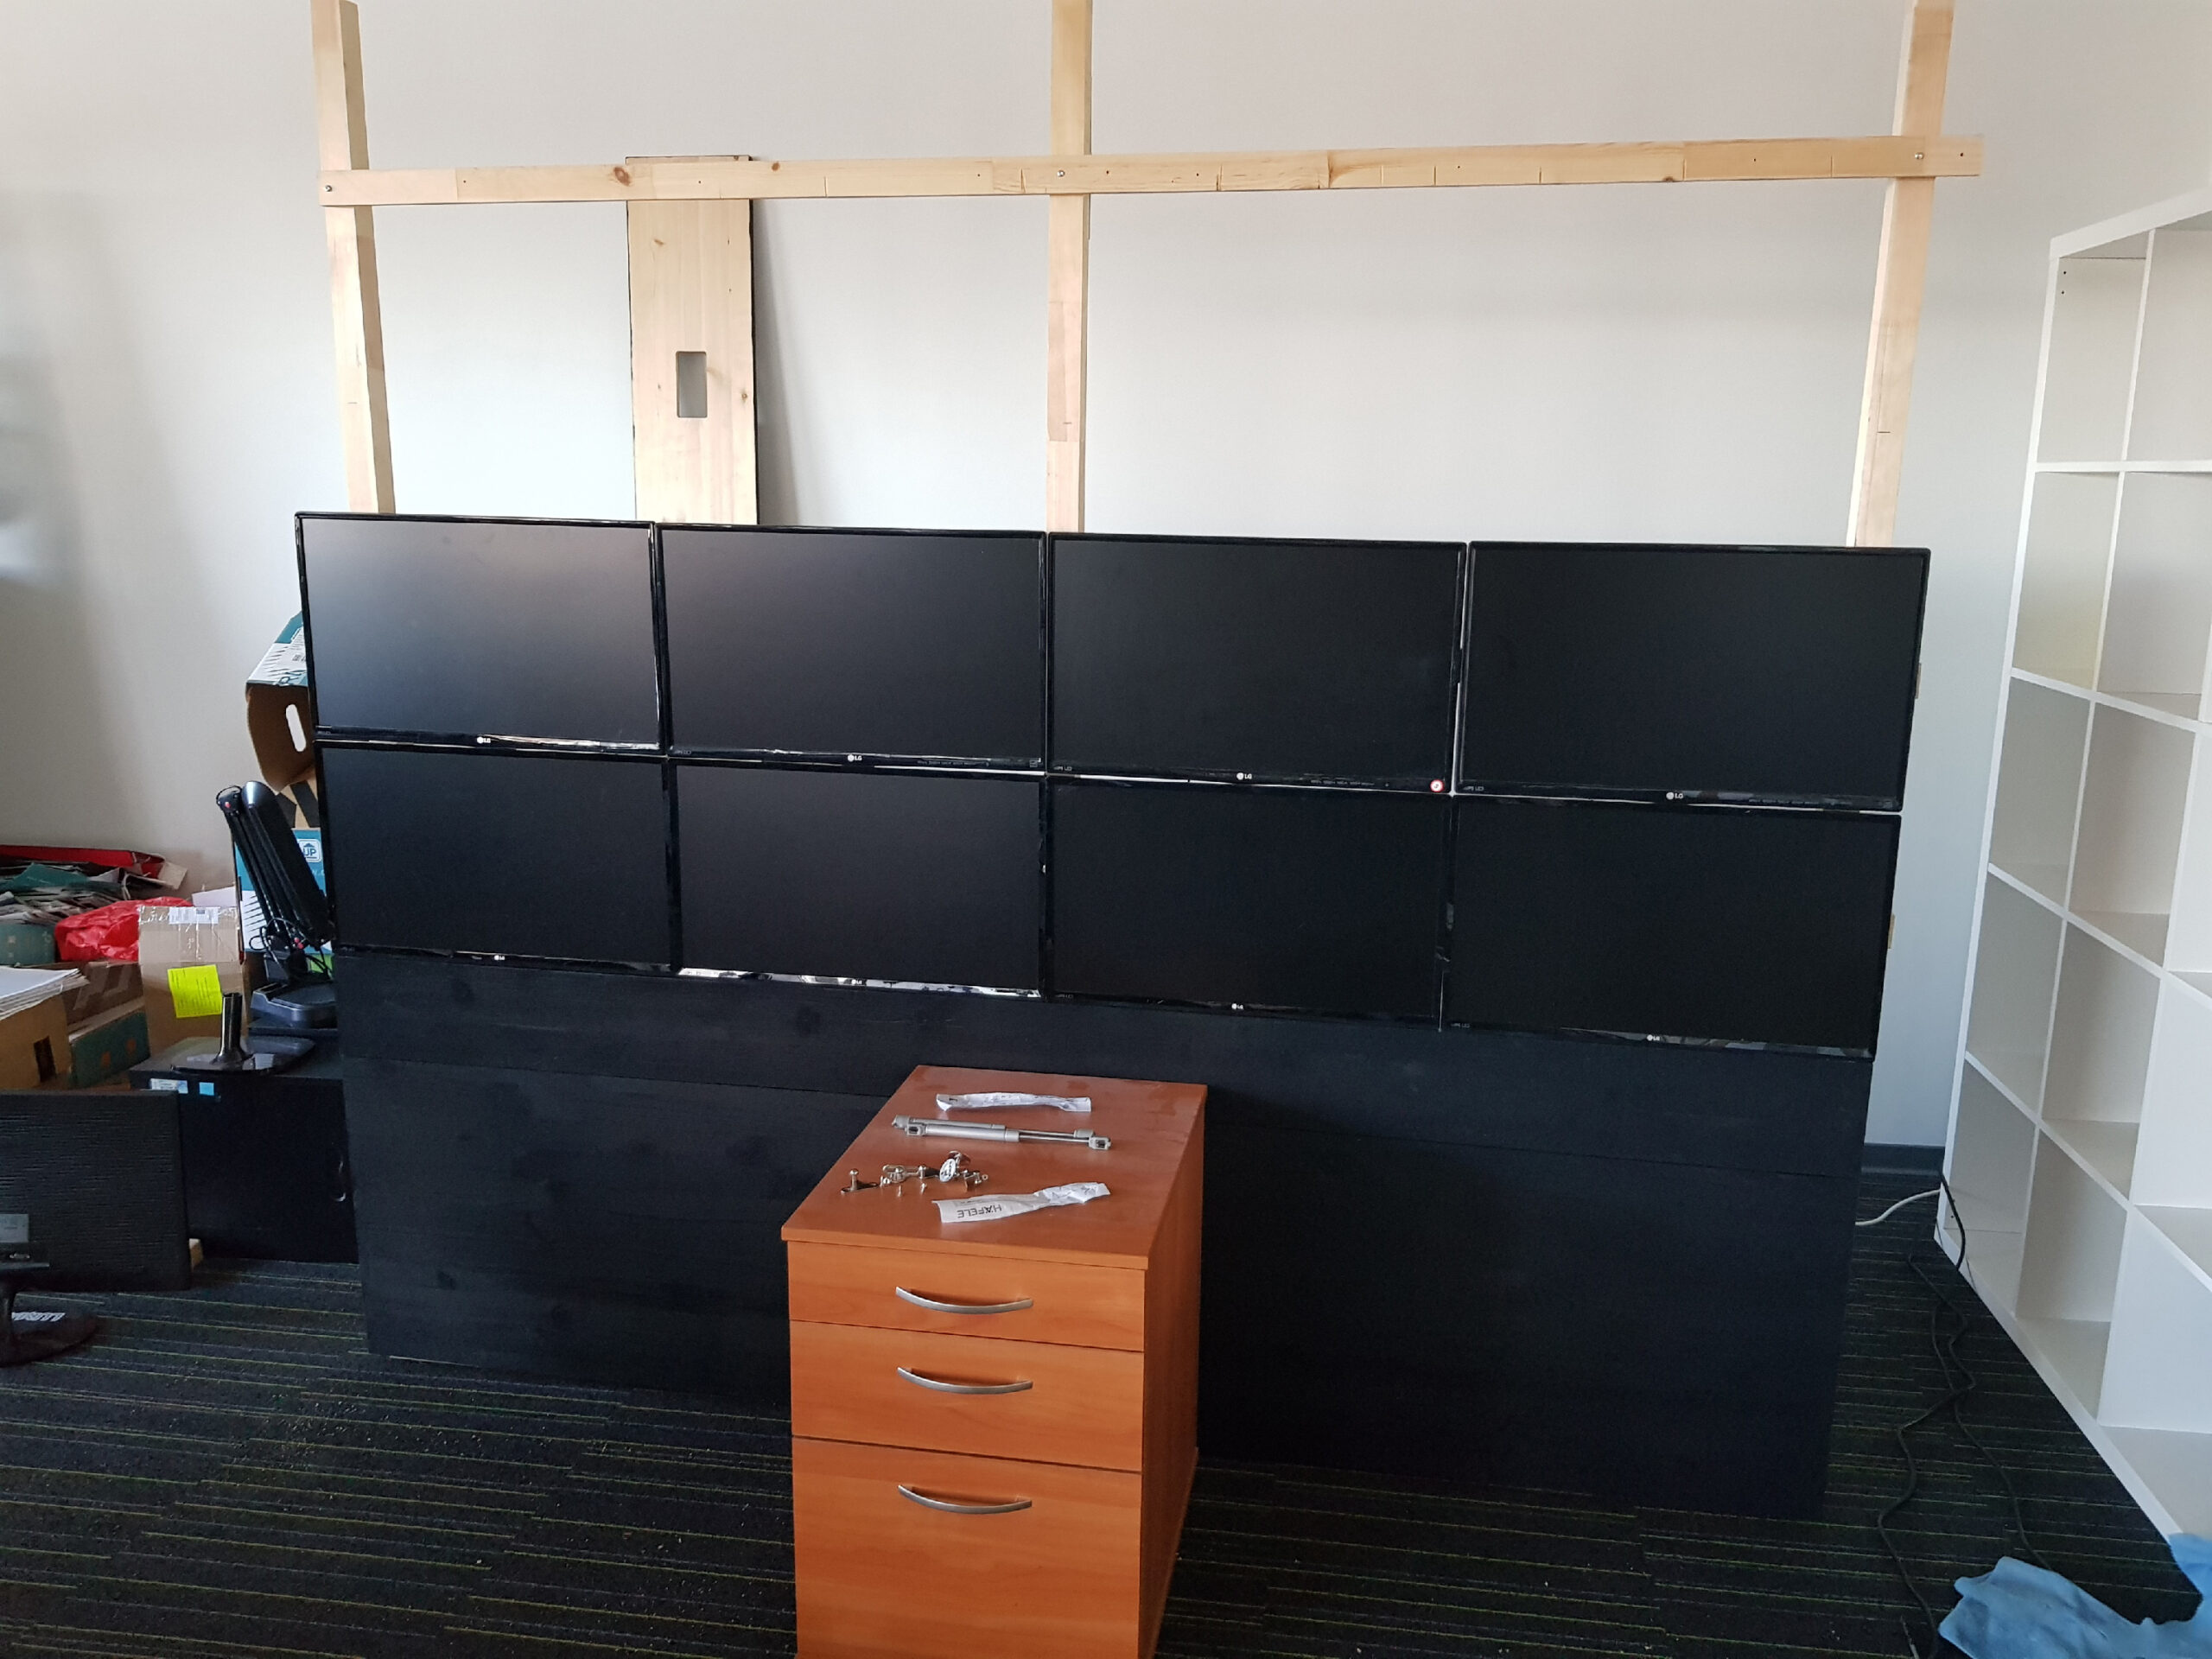
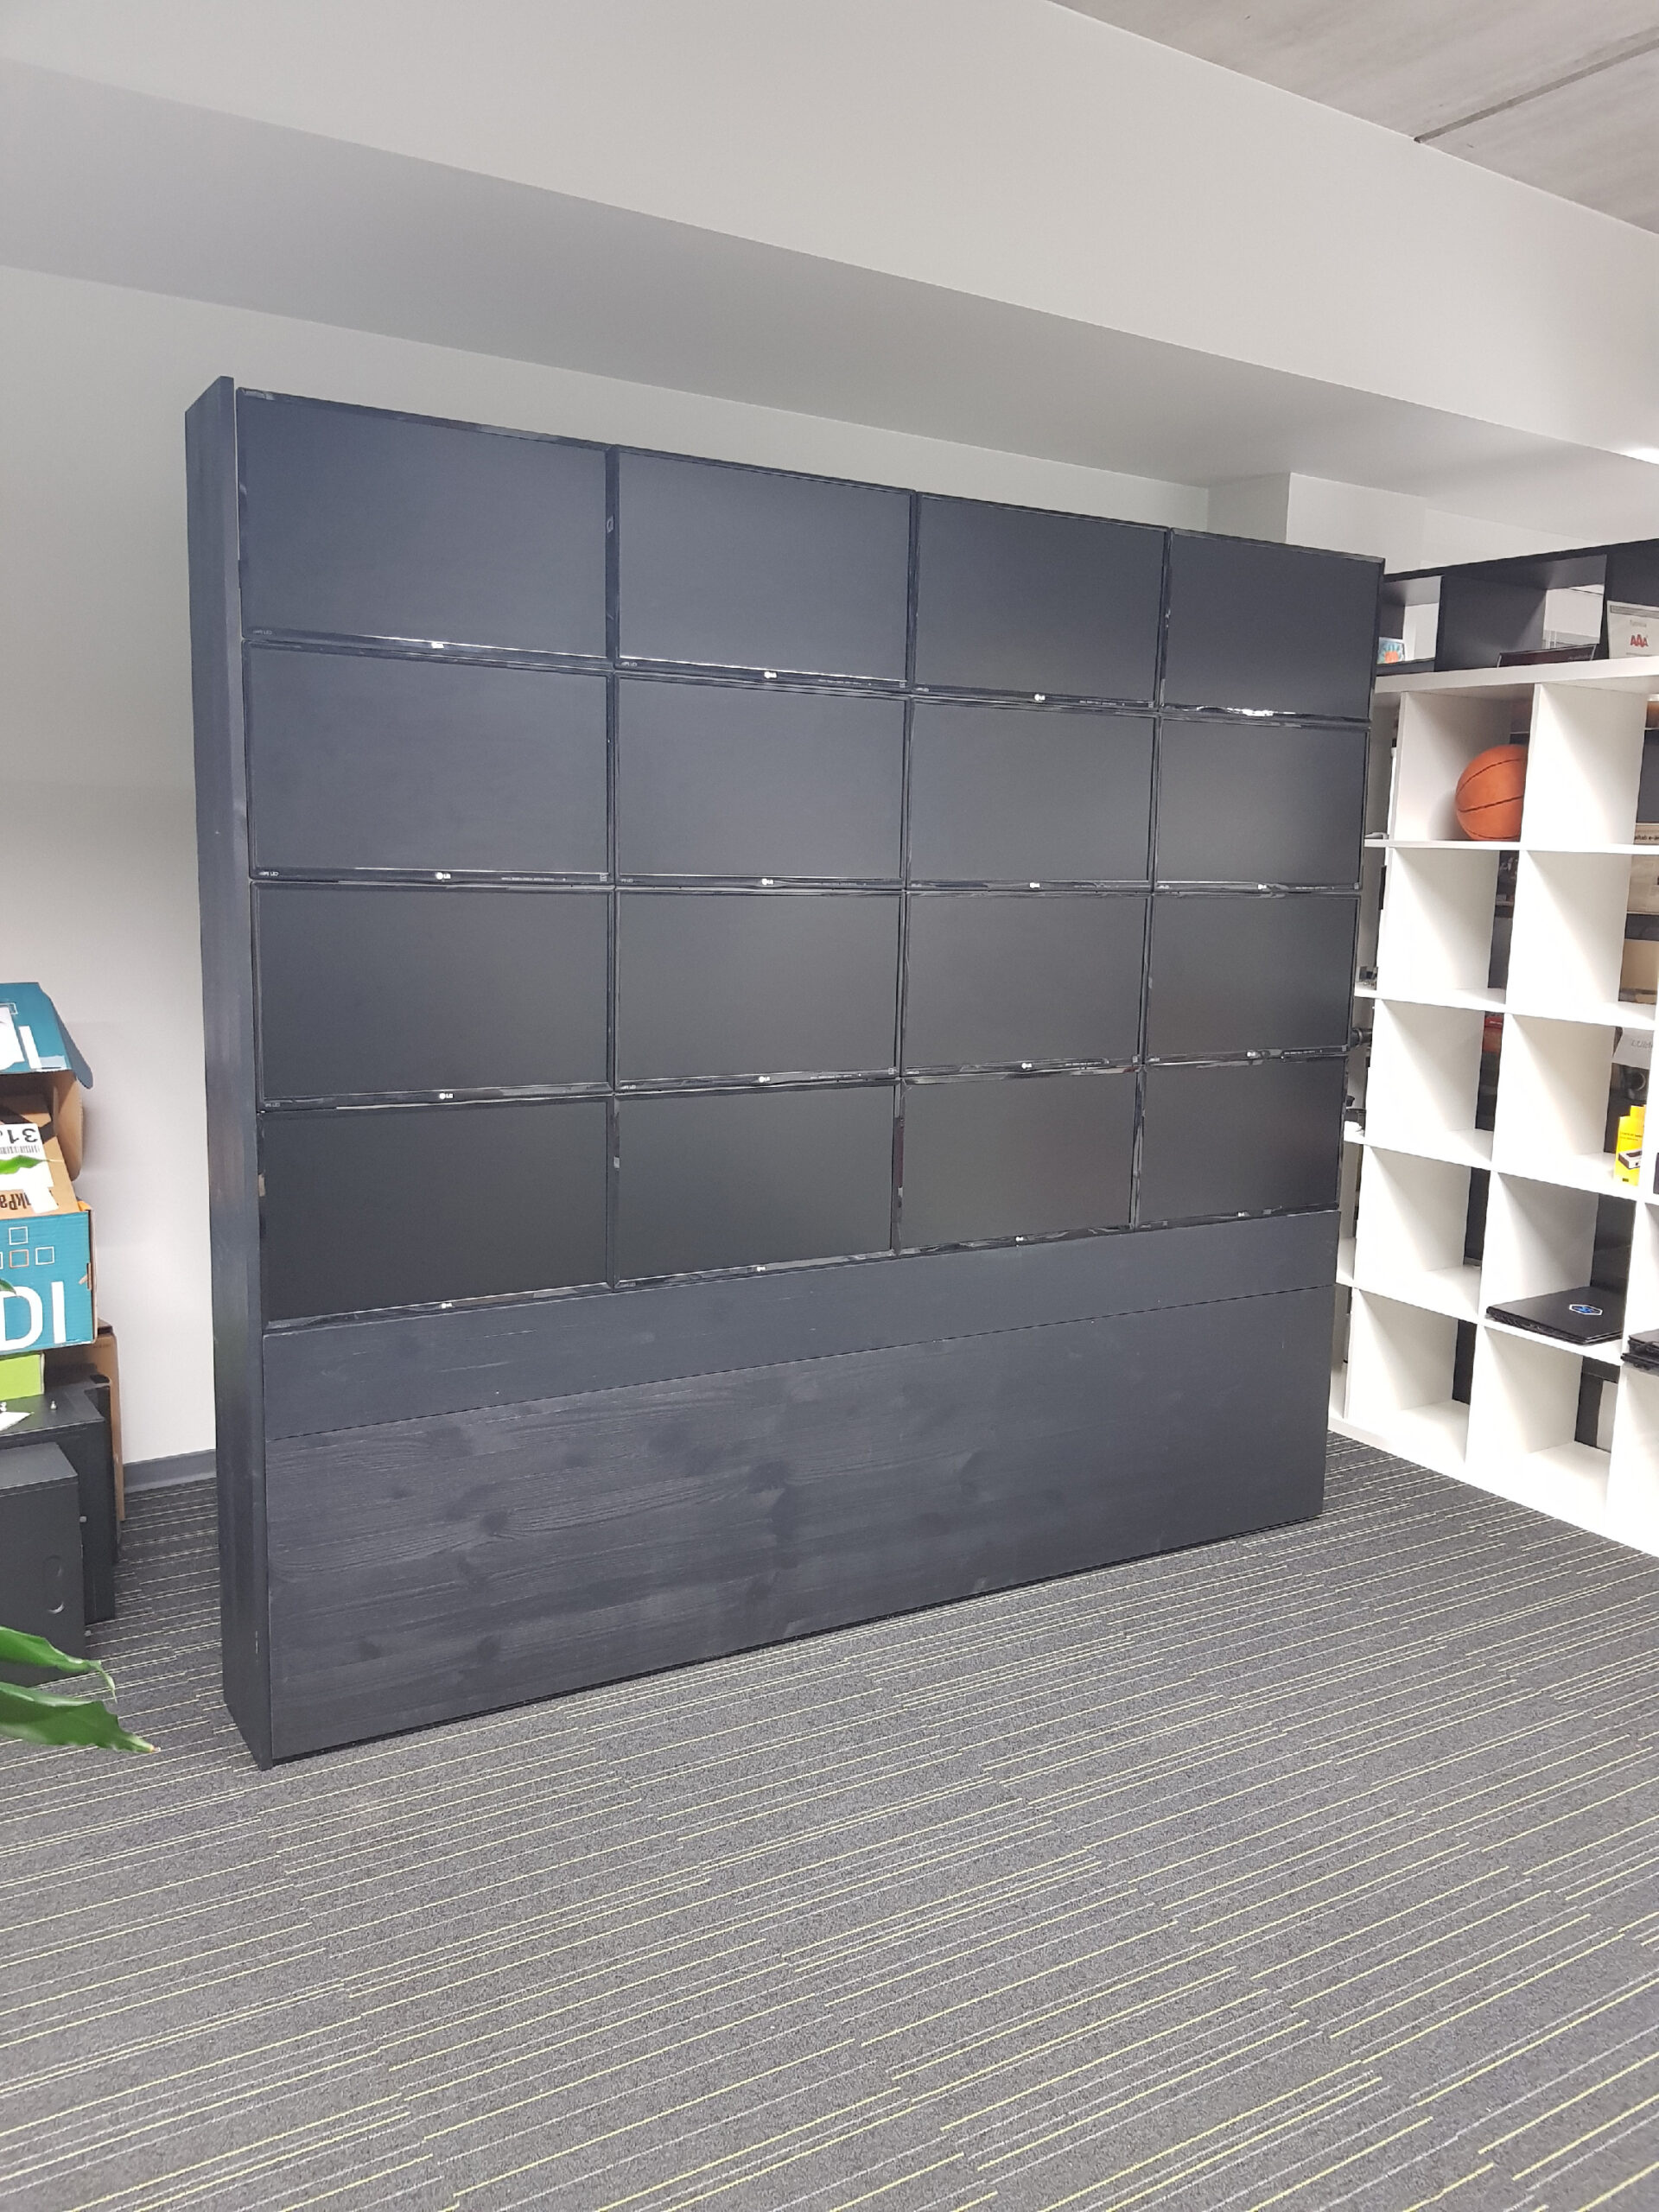
Monitor frame
The frame was made from wood to be lighter, cheaper and easier to construct. The lower hatch under the monitors is hinged and can be lifted, so that you can access the computer if necessary and make it more accessible when you need to pull the monitor away from the wall. The hatch was held in place by gas springs, which meant that the hatch did not have to be fixed when it was lifted.
Construction
The height of the monitor was 183cm, width 220cm and depth 22cm.
Finishing and calibration
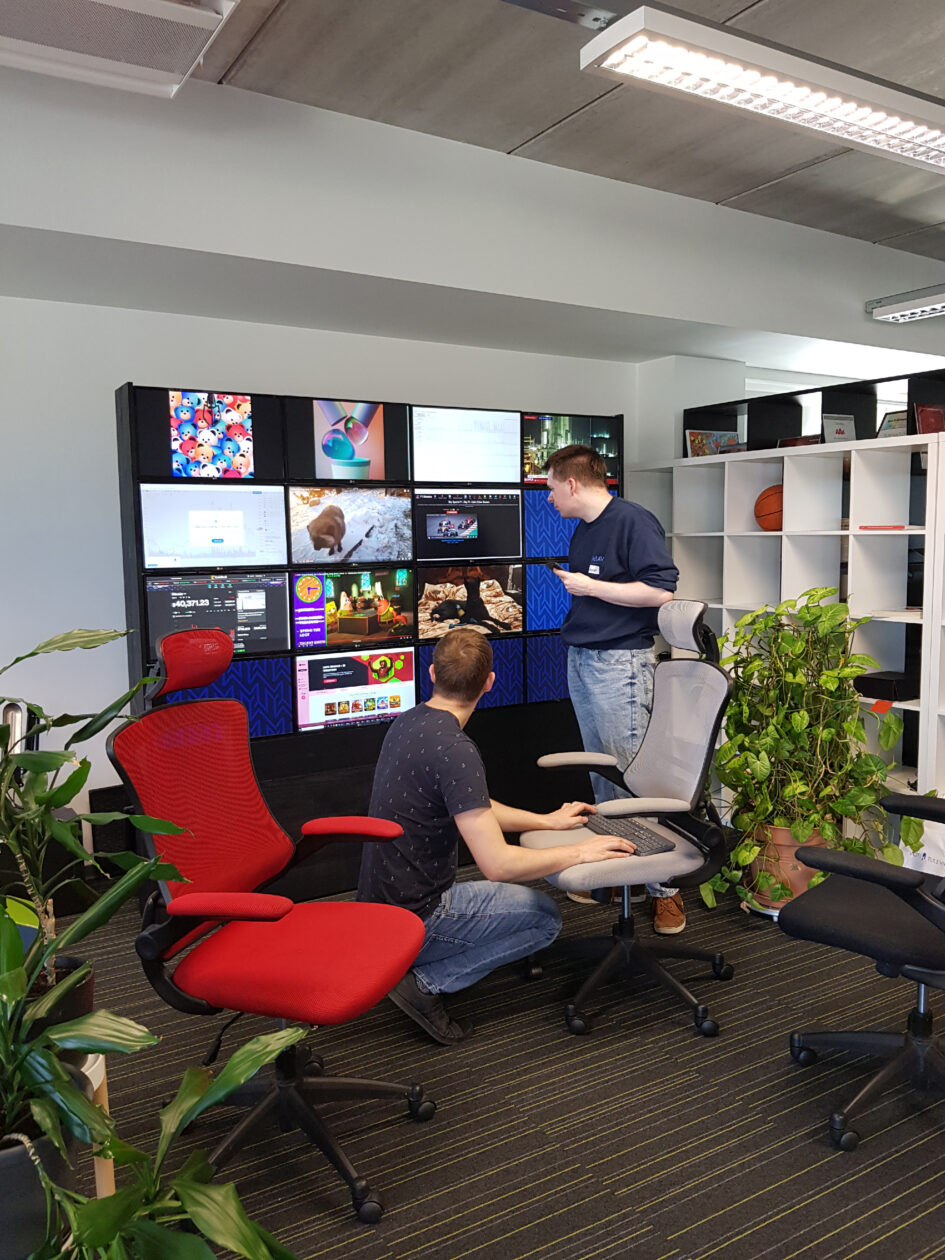
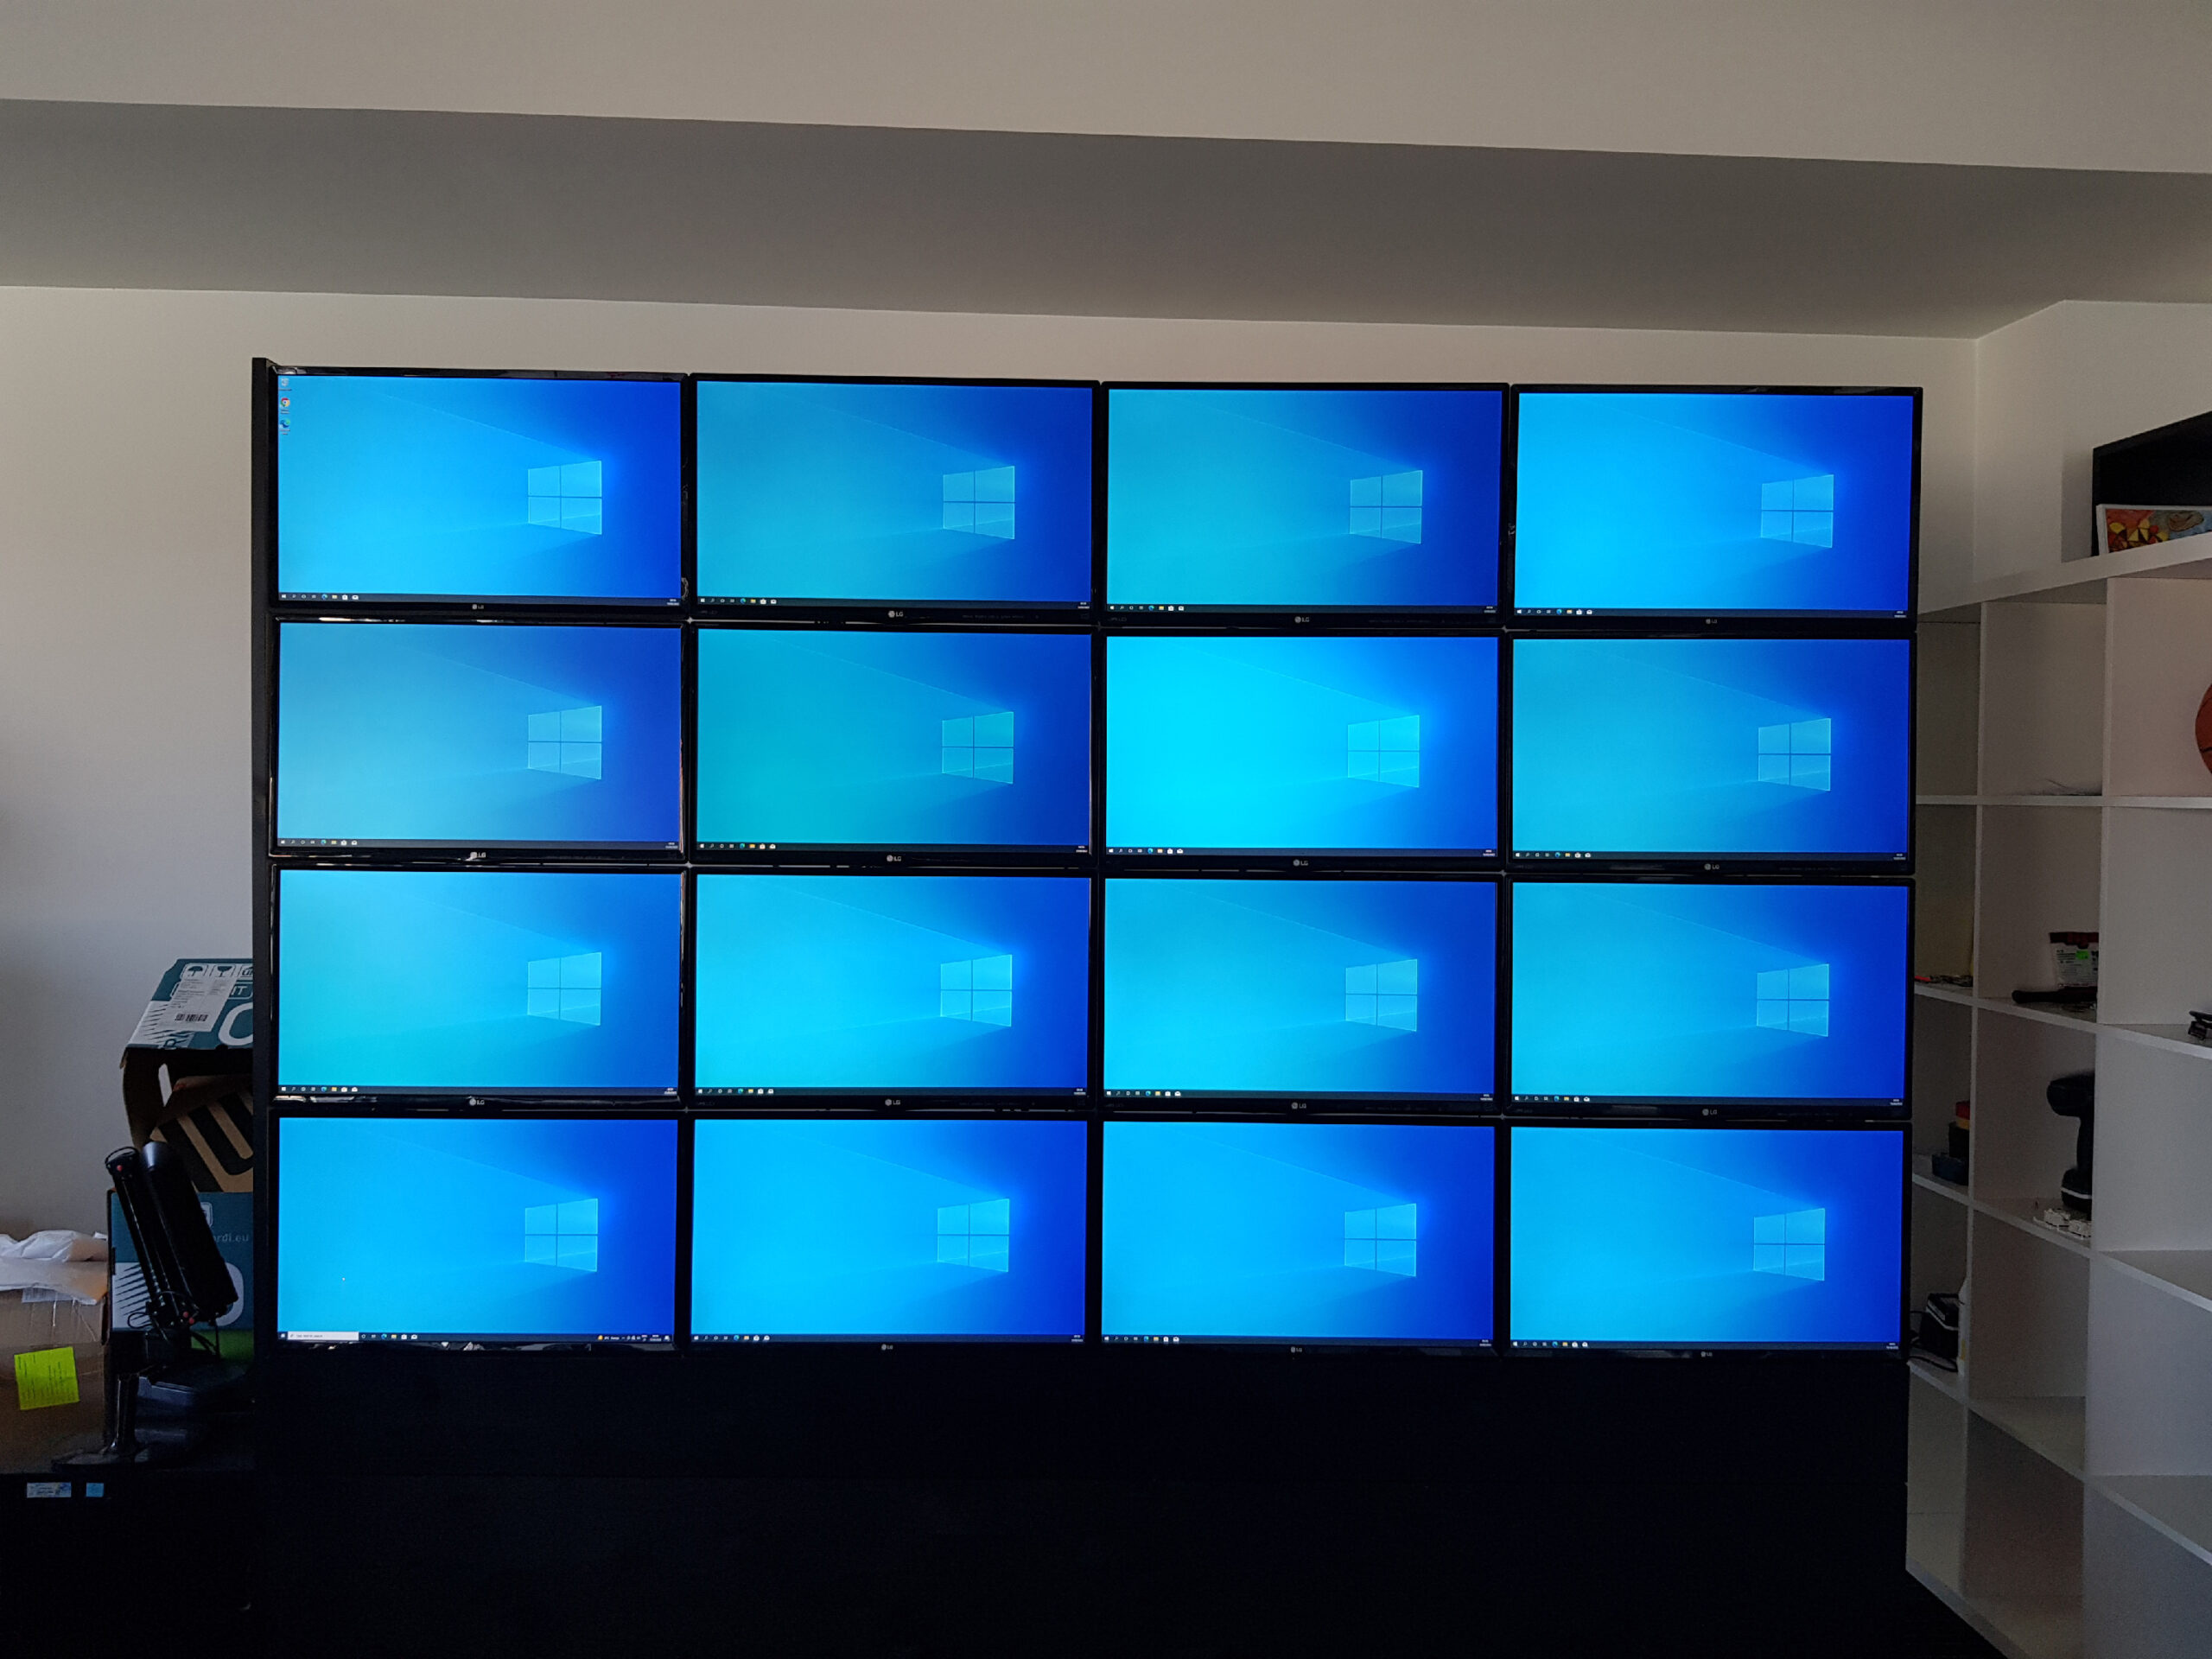
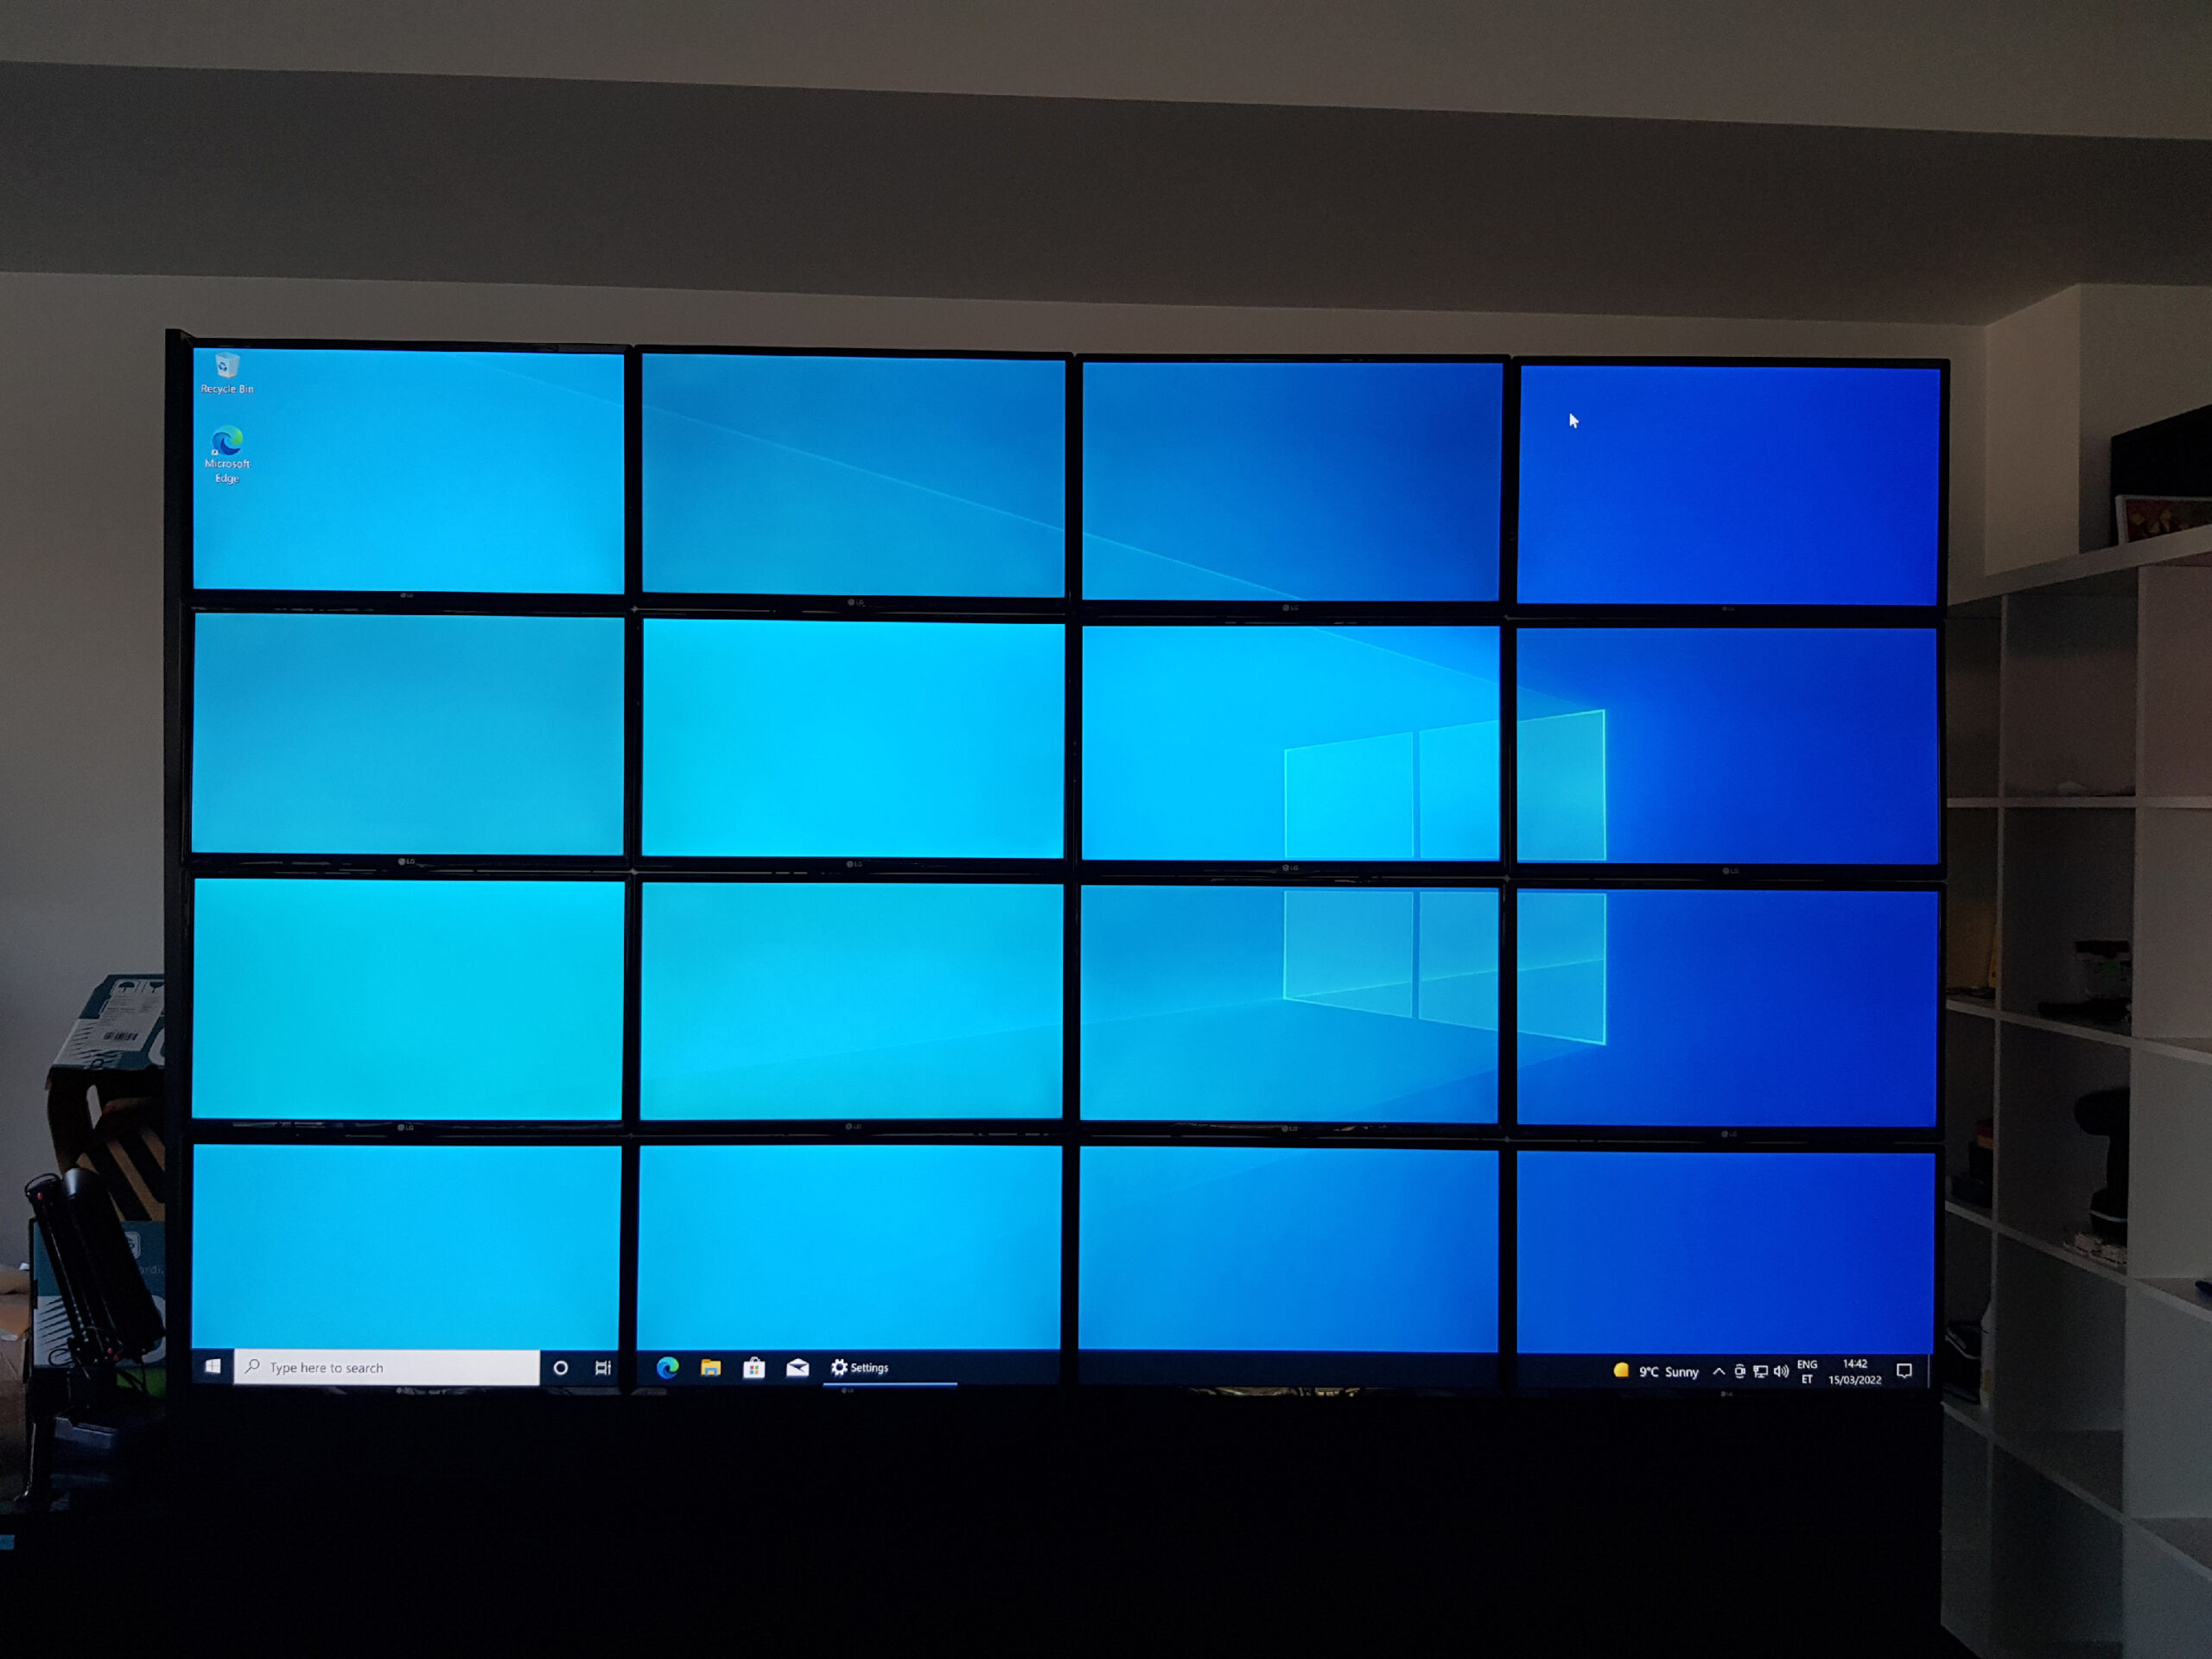
Once the monitor wall was together, it was time to connect the cables and start setting up the Nvidia mosaic in Windows.

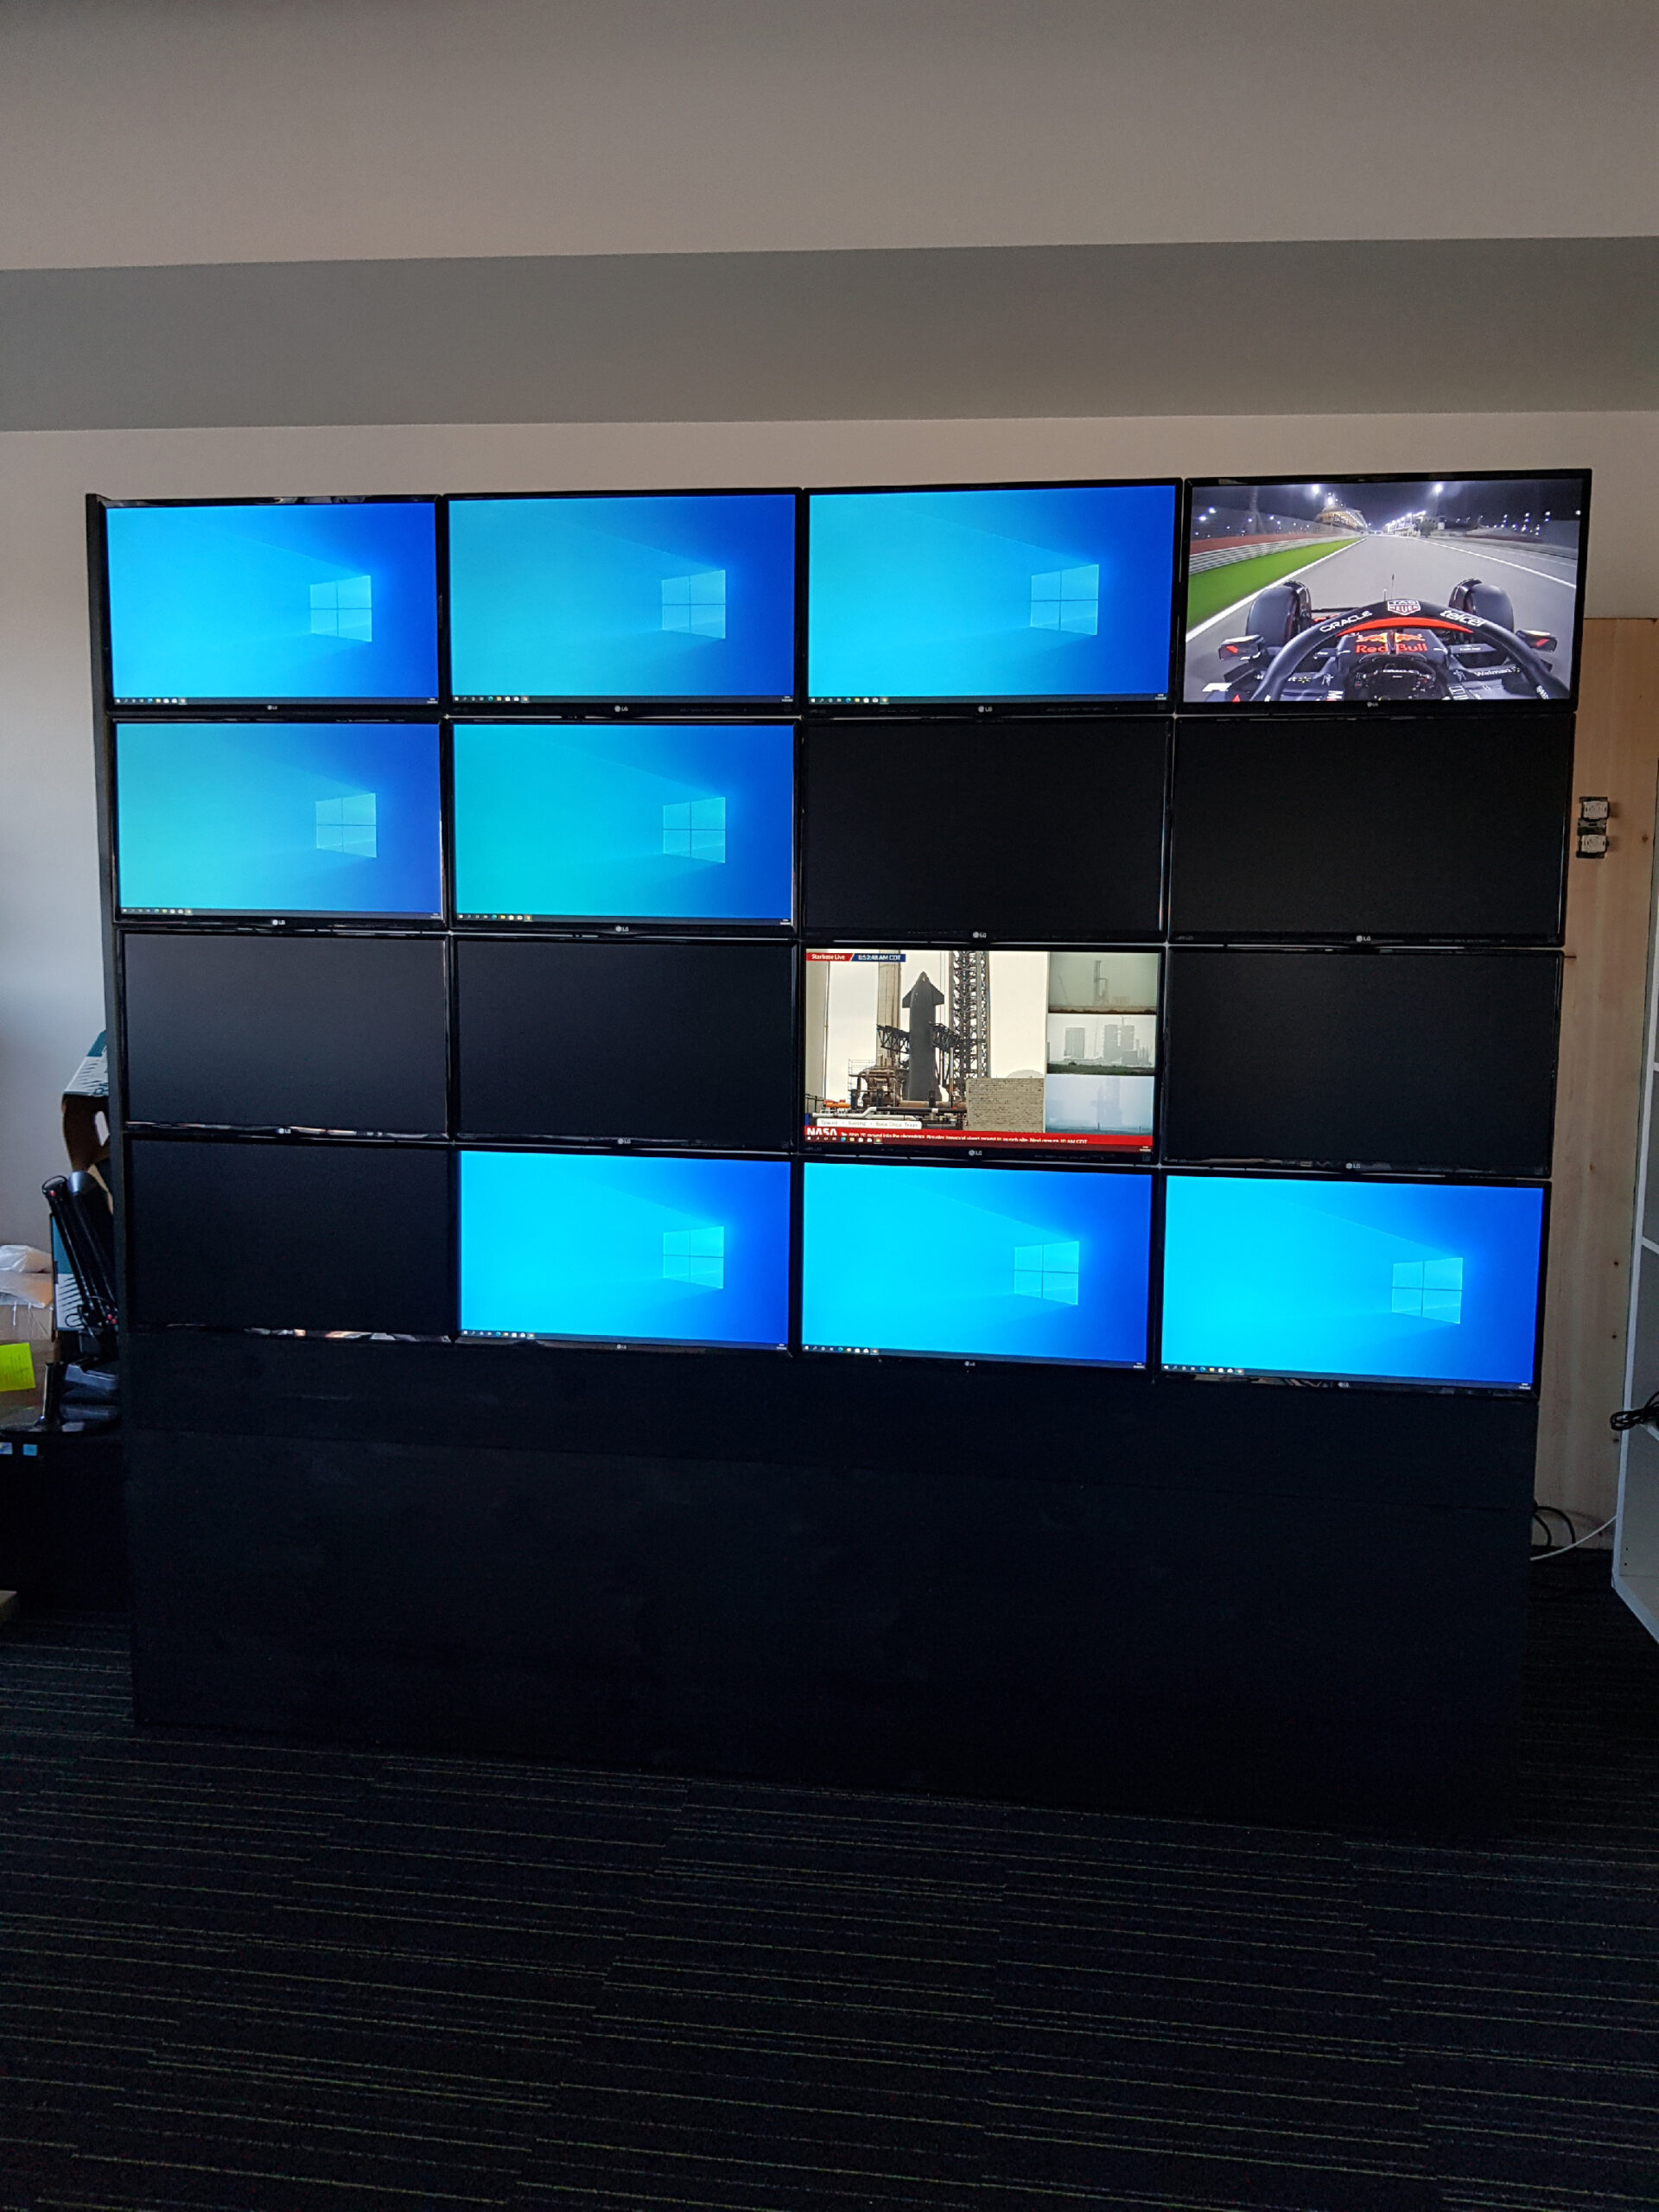
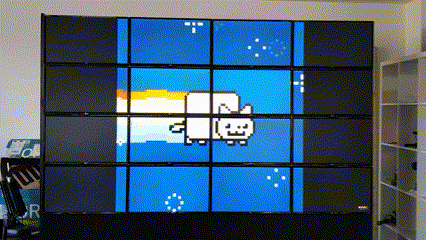
As a test, a video was run on the screens, which became Nyan Cat. As a result, you could see that all the screens were running in sync
The colors of the screens were also calibrated to be uniformly the same

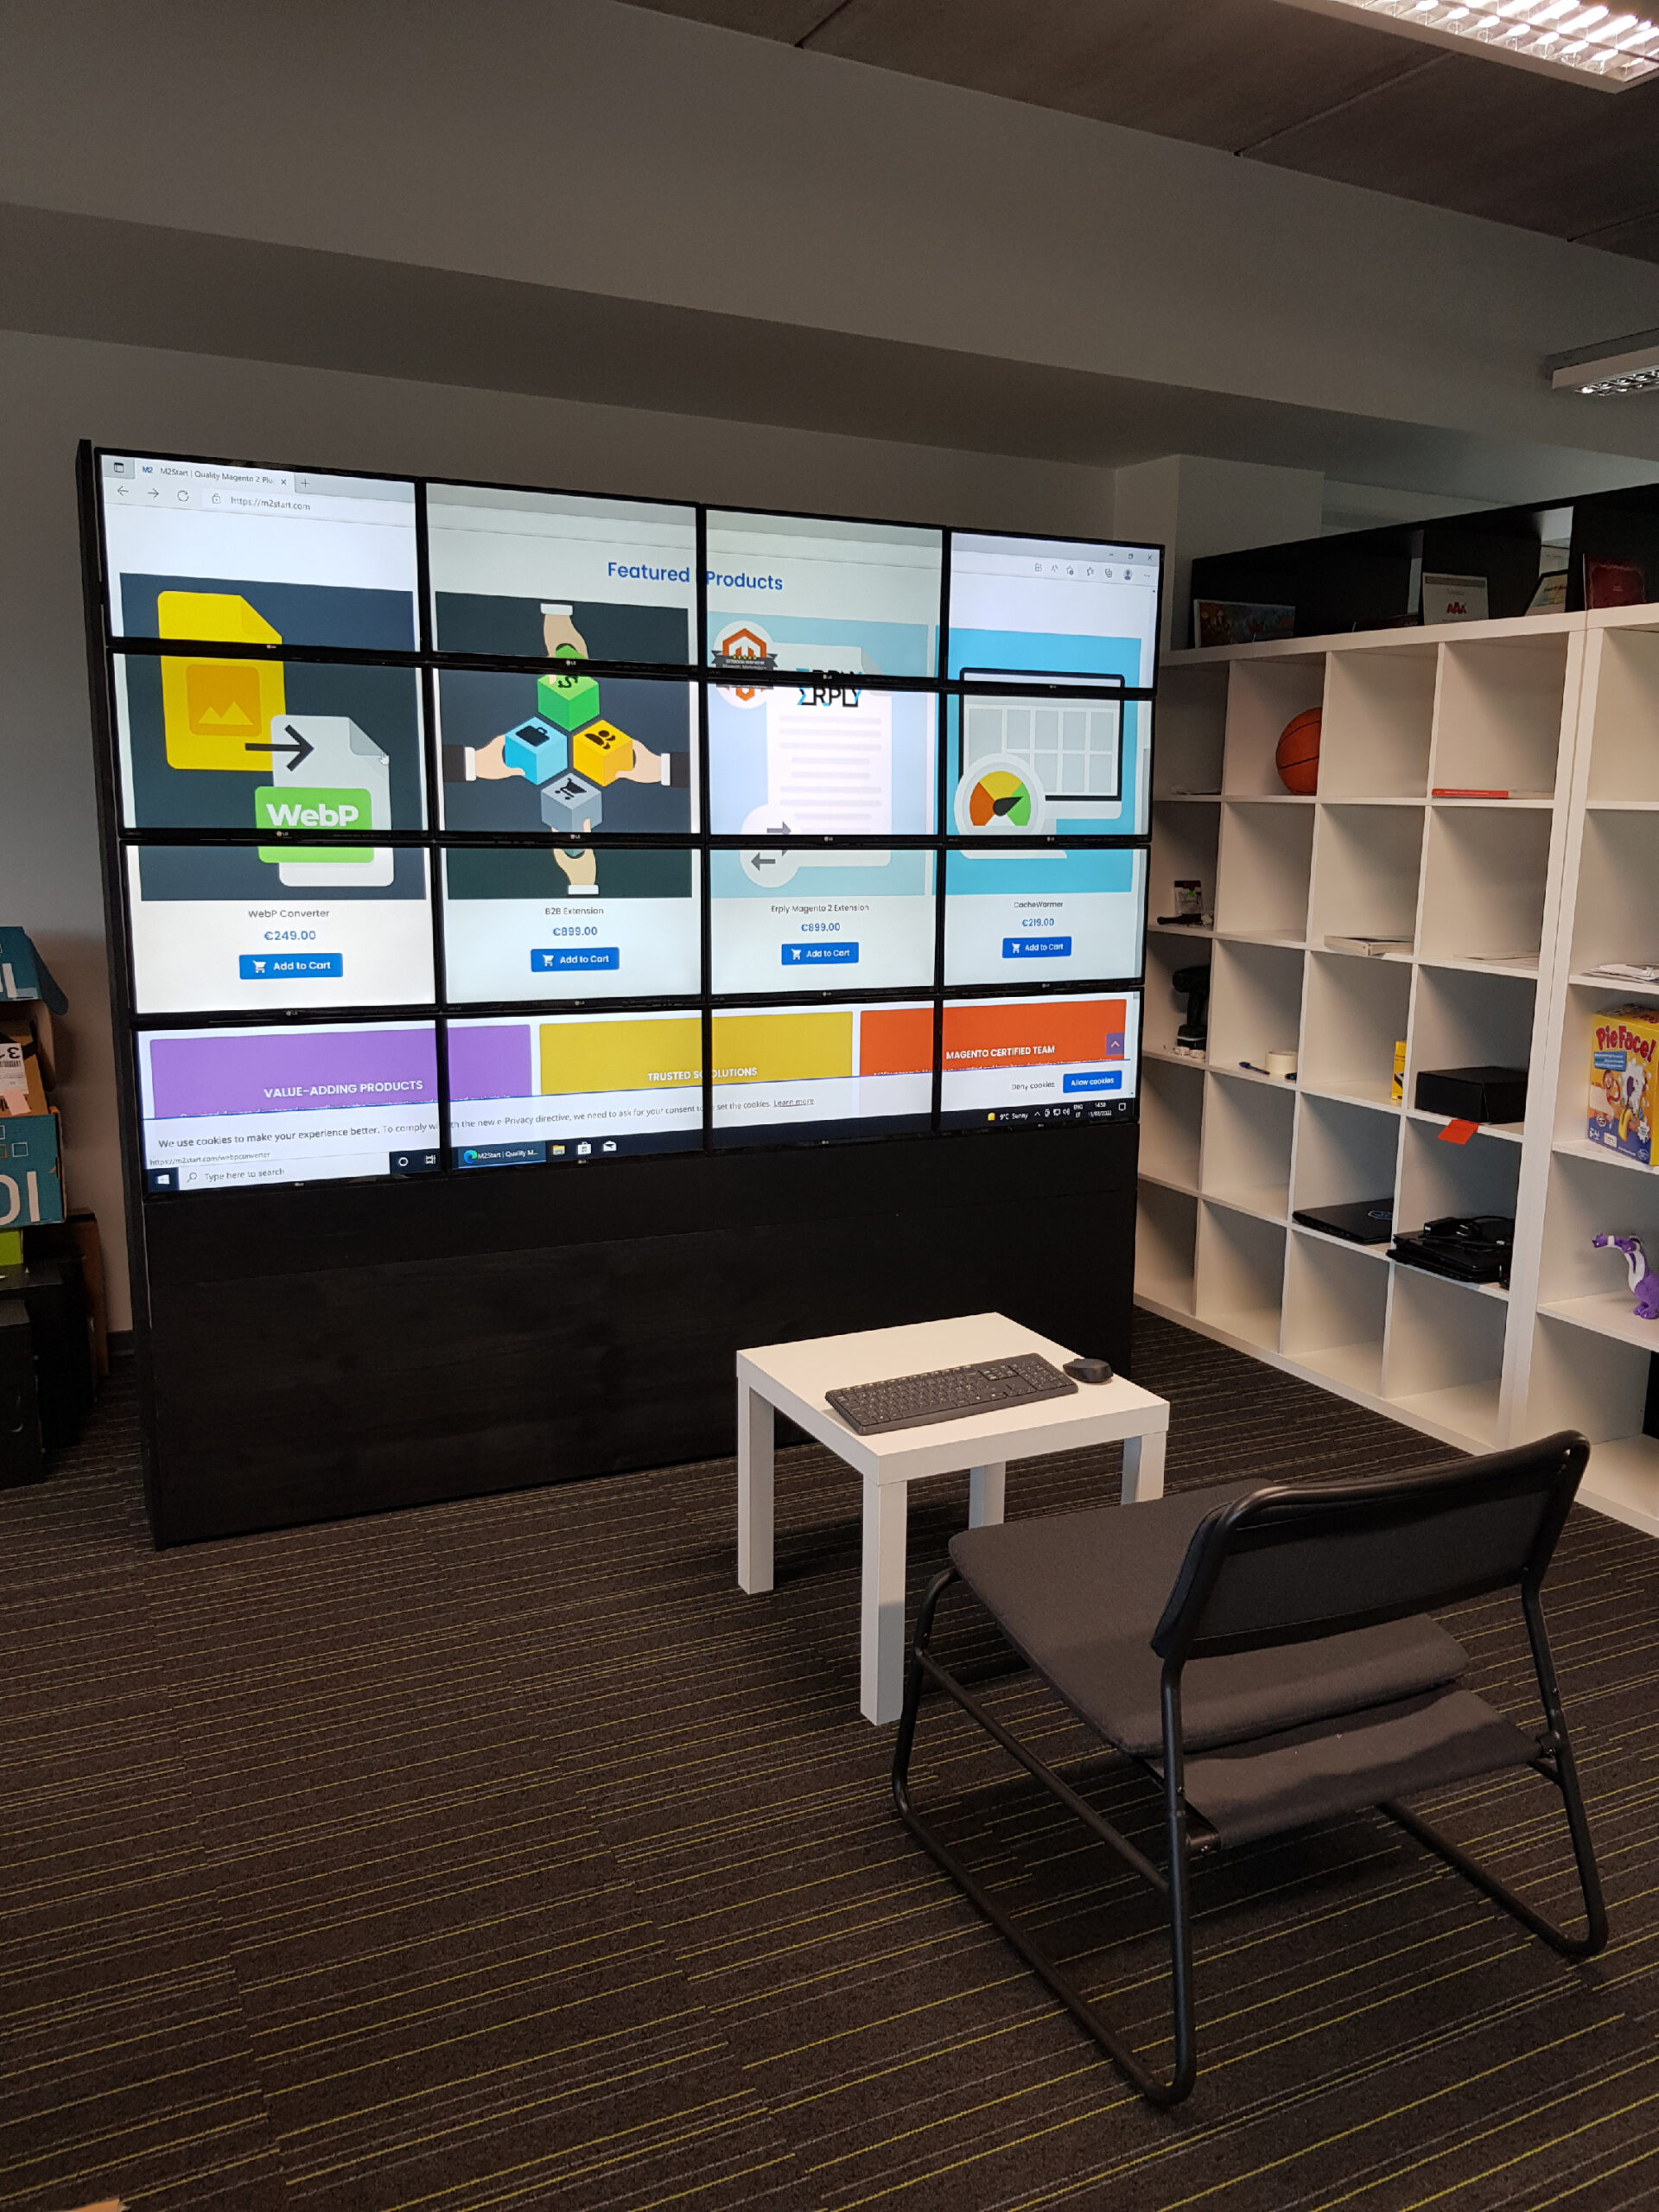
Benchmark, multiple FHD videos can be run by one machine at the same time
Key word – giving new life to old technology.
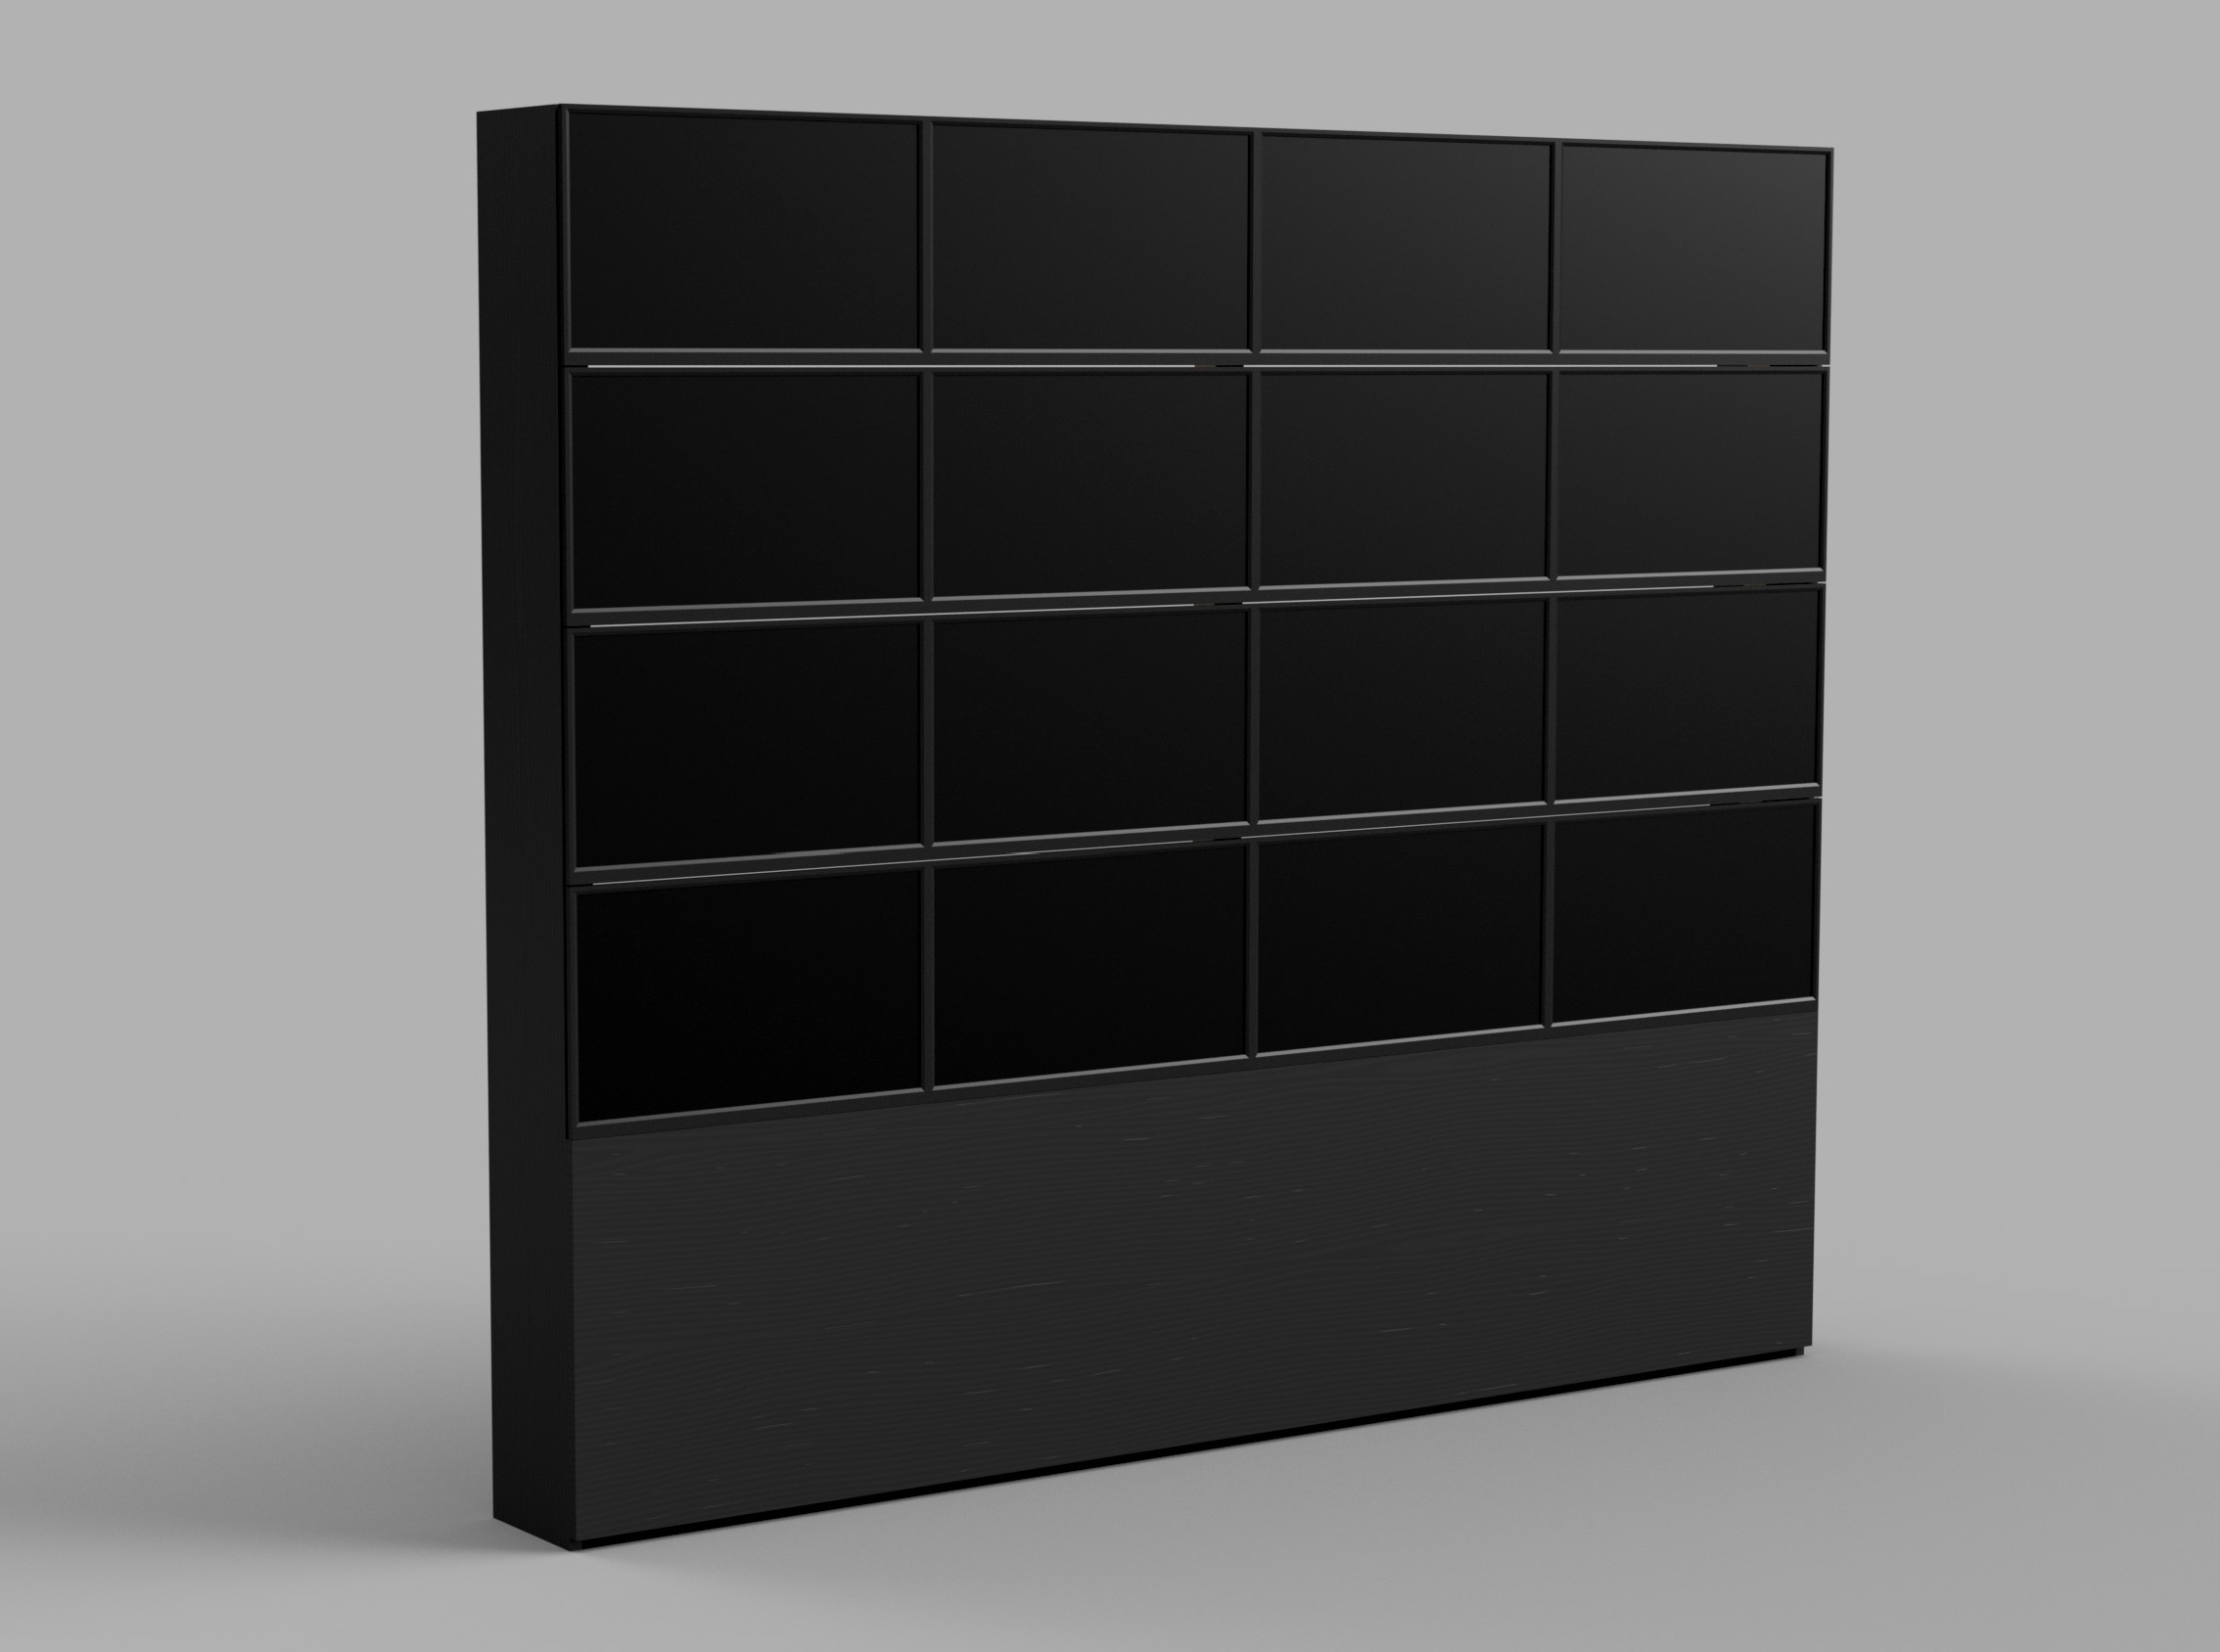
The result – 8K 60Hz mosaic screen.